
The holiday season is here, and you’re probably on the hunt for fun and creative activities to do with your little ones. Why not make some special memories with pine cone crafts that are perfect for kids? Not only are they easy to make, but they also add a natural touch to your Christmas decor. Pine cone crafts can be turned into beautiful ornaments, garlands, and decorations that will become treasured family keepsakes. In this article, we’ll show you how to create these simple yet stunning pine cone crafts with step-by-step guides. From making pinecone bird feeders to decorating the tree with pine cone garlands, we’ve got you covered. Get ready to unleash your child’s creativity and have a blast making these easy and fun pine cone crafts for Christmas!
Introduction to Pine Cone Crafts
Get ready to unleash your creativity and make some magical memories with our kid-friendly guide to making pine cone crafts for Christmas! We’ll share fun ideas to get you started.
What are Pine Cones and Why Use Them in Crafting?
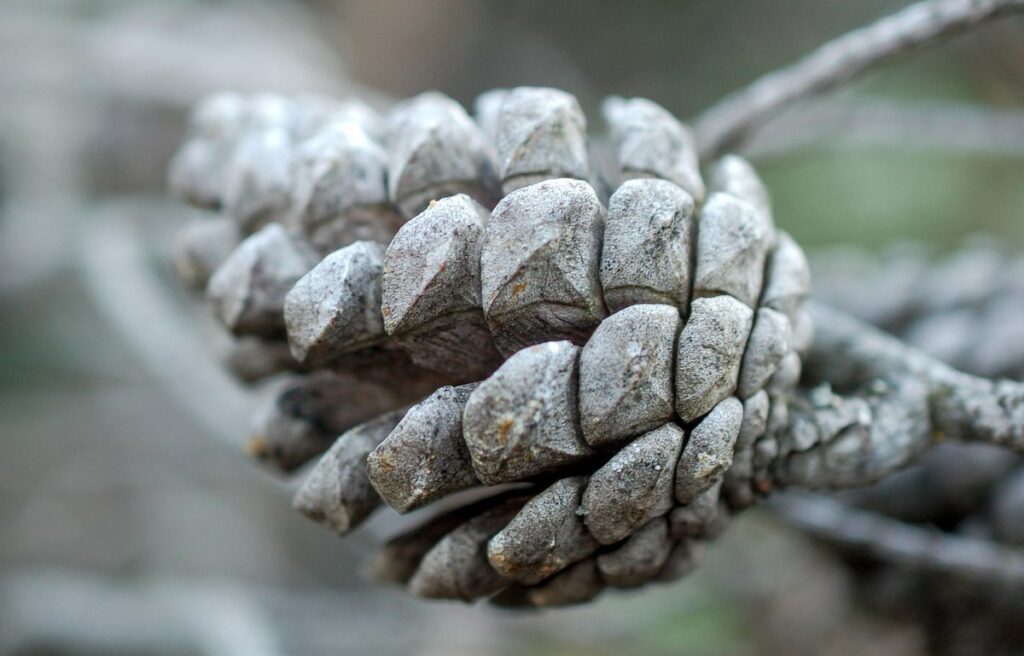
Pine cones are a natural wonder that can add a touch of magic to your Christmas crafts. These tiny bundles of seeds are a vital part of the pine tree’s reproductive cycle, and they come in an assortment of shapes, sizes, and colors. One of the most fascinating things about pine cones is their unique texture – from the soft, pliable scales on some species to the hard, woody ones found on others.
Kids love working with pine cones because they’re easy to shape and mold into various forms. You can use them as decorations, gift embellishments, or even create ornaments that will last for years to come. The best part? Pine cones are readily available in most parts of the country, often at no cost at all – just collect them from your yard or a nearby park!
When using pine cones in crafting with kids, it’s essential to teach them about their natural origin and importance. This can spark curiosity and encourage learning about the environment. To get started, gather an assortment of pine cones, some basic craft supplies, and let your little ones’ creativity shine!
Benefits of Making Pine Cone Crafts with Kids
Making pine cone crafts with kids is an activity that offers numerous benefits for their development and enjoyment during the holiday season. One of the primary advantages is the improvement of fine motor skills. As children collect and assemble various materials to create their pine cone crafts, they practice manipulating small objects, which strengthens hand-eye coordination and dexterity.
In addition to developing fine motor skills, making pine cone crafts fosters creativity in kids. They have the opportunity to experiment with different designs, colors, and textures, allowing them to express themselves freely. This creative expression can help build confidence and self-esteem as they showcase their unique creations.
Making pine cone crafts also evokes a sense of holiday cheer among children. It encourages family bonding, as parents or caregivers engage in the activity alongside kids. The process of creating something special together creates memories that last a lifetime. To make the most out of this experience, encourage your child to take ownership of their project by allowing them to choose materials and designs. This will not only enhance their creativity but also ensure they have fun while making their pine cone craft.
Materials Needed for Pine Cone Crafts
To create beautiful pine cone crafts, you’ll need some essential materials that are easy to find at home or in craft stores. Gather these items before we dive into the fun projects!
Essential Supplies: Pine Cones, Glue, Scissors, and More
To create beautiful and unique pine cone crafts with your kids, you’ll need to gather some essential supplies. First and foremost, you can’t go wrong with pine cones themselves! Collect them from your backyard or a nearby park, or purchase them at a craft store. Make sure to rinse them gently with water to remove any dirt or debris.
In addition to pine cones, here are some other necessary materials:
* Glue: This is the adhesive that will hold your pine cone creations together. You can use hot glue, white glue, or even a glue stick – whatever works best for your project.
* Scissors: Good-quality scissors will make cutting and trimming easier and safer for kids. Consider using kid-friendly blunt-tipped scissors to prevent any accidents.
* Other materials may include string or twine, ribbons, felt, glitter, and decorative items like beads or sequins.
When it comes to where to find these supplies, you can usually find them at craft stores like Michael’s or Hobby Lobby, or even online at Amazon. Don’t be afraid to get creative and repurpose materials from around the house – an old jar of buttons or a spool of thread can become a fun addition to your pine cone craft project!
Additional Embellishments and Decorations
Now that you’ve got your pine cones and basic materials, it’s time to get creative with additional embellishments and decorations! These fun extras can add a whole new level of excitement to your crafts. Let’s explore some popular options.
Ribbon and twine are great additions to many pine cone crafts. Use them to create garlands, gift toppers, or even as a decorative accent for your tree branches. You can tie the ribbon in bows or use it to wrap around the pine cones for a more rustic look. Consider using different textures, such as burlap or velvet, to add depth and interest.
Glitter is another way to make your crafts sparkle! Add a pinch of glitter glue to give your pine cones some extra shine, or sprinkle it on top for a more subtle effect. Be sure to use a fine-mesh paintbrush to contain the mess. Don’t be afraid to mix and match different colors – a single strand of silver or gold can make a big impact.
Paint is also an excellent way to add personality to your pine cone crafts. Use acrylic or watercolor paints to create patterns, stripes, or even small designs. If you’re feeling adventurous, try layering paint for unique textures or effects.
Easy Pine Cone Ornaments
Get creative and make some adorable pine cone ornaments with your kids, perfect for decorating your Christmas tree with a personal touch. This fun project is super easy to follow.
Project 1: Simple Glue-on Pine Cones
Let’s get started on creating our first pine cone ornament project that’s perfect for kids to make. This one is super simple and requires just a few basic materials: some glue-on pine cones, a hot glue gun (with adult supervision), and some decorations of your choice.
To begin, start by preparing your pine cones by giving them a quick dusting with a soft brush or a lint-free cloth to remove any loose debris. Next, apply a small amount of hot glue to the top of each pine cone, making sure not to glob too much on there. Place the pine cone onto a flat surface and let it dry completely before handling.
Once your pine cones are ready, have fun decorating them! You can use glitter, sequins, or even little beads to give them some sparkle. If you’re feeling creative, try using a small paintbrush to add some color or patterns to your pine cone. The key is to keep things simple and let the kids take the lead – after all, it’s all about having fun making these ornaments together!
Project 2: Painted Pine Cones with Ribbons
For Project 2, you’ll be creating painted pine cones with ribbons. This project is perfect for kids who love to get creative and experiment with different colors and textures.
To start, gather your materials: a few pine cones, some paint (acrylic or watercolor work well), paintbrushes, scissors, glue, and ribbons of various widths and patterns. When it comes to choosing colors, remember that you can’t go wrong with classic combinations like red and green for Christmas or gold and silver for a more elegant look.
Consider the theme of your holiday decor when selecting ribbon colors and patterns. For example, if you’re going for a rustic, woodland feel, choose earthy tones and natural fibers. If you prefer a more modern look, opt for bold colors and metallic ribbons.
Once you’ve painted and dried your pine cones, it’s time to add the finishing touches with your chosen ribbons. Use glue to attach the ribbons to the pine cone, making sure they’re securely in place. Encourage kids to experiment with different ways of attaching the ribbon, such as wrapping or tying it around the cone.
This project is a great way to teach kids about color theory and how to balance different textures and patterns. With a little creativity, you’ll have beautiful, one-of-a-kind ornaments that will add a personal touch to your holiday decor.
Pine Cone Garland Ideas
Create a beautiful and festive atmosphere in your home with our easy-to-make pine cone garland ideas that kids will love to craft themselves. Perfect for Christmas decorations!
How to Create a Pine Cone Garland
Creating a beautiful pine cone garland is a fun and easy DIY project that kids can help with. To get started, gather materials such as pine cones of various sizes, twine or string, scissors, and a hot glue gun (for adult use). Begin by collecting and sorting the pine cones by size to create a visually appealing arrangement.
Thread the largest pine cone first onto the twine, leaving about 2-3 inches of space between each cone. Then, continue adding smaller pine cones in an alternating pattern, making sure to leave enough space for each one to hang freely. To add some extra texture and interest, you can also include dried cranberries or small ornaments on your garland.
When hanging the garland, consider placing it in a spot with good lighting where its unique shape and texture can be fully appreciated. You can also experiment with different lengths and arrangements to suit your desired display style. With a little creativity, your pine cone garland will become a beautiful and festive centerpiece for any room.
Variations: Adding Lights or Ribbons to Your Garland
Adding lights or ribbons to your pine cone garland is an easy way to take it to the next level and make it even more stunning and festive. One of the simplest ways to add some extra sparkle is by incorporating fairy lights or string lights into your design. Simply weave the lights through the pine cones, spacing them out evenly to create a beautiful and eye-catching effect.
You can also use ribbons in various colors and textures to add depth and interest to your garland. Consider using velvet ribbons for a luxurious feel or satin ribbons for a more rustic look. To incorporate ribbons into your design, simply tie them around the pine cones in a looped or knotted pattern. This adds a pop of color and creates a cohesive look.
Another idea is to use natural elements like dried flowers, greenery, or berries to create a unique and fragrant garland. You can also mix and match different textures and materials to create a truly one-of-a-kind design. The possibilities are endless when it comes to adding lights or ribbons to your pine cone garland – get creative and have fun with it!
3D Pine Cone Decorations
Get creative and bring your festive space to life with these easy-to-make 3D pine cone decorations, perfect for a fun Christmas craft day with kids!
Project 1: Pine Cone Wreaths
Creating a pine cone wreath is an excellent way to get kids involved in crafting for Christmas. To start, gather materials such as pine cones, wire wreath frame, floral tape, and decorations like ribbons or artificial berries.
First, begin by shaping the wire wreath frame into a circular shape. This will serve as the base of your pine cone wreath. Next, tie the pine cones to the wire frame using floral tape, overlapping them slightly to create a full appearance.
When it comes to arranging the pine cones, symmetry and balance are key to creating a visually appealing wreath. Encourage kids to work in pairs or teams to distribute the pine cones evenly around the frame. You can also teach them about the concept of radial symmetry by dividing the wreath into equal parts and placing pine cones in each section.
Remember, it’s okay if the wreath isn’t perfect – imperfections add character! As you’re arranging the pine cones, ask your child to consider the balance between full and sparse areas. This will help them develop their spatial reasoning skills while having fun creating a beautiful pine cone wreath for Christmas.
Project 2: Pine Cone Centerpieces
To create stunning pine cone centerpieces for your Christmas table, follow these easy steps. First, gather your materials: a variety of pine cones, some decorative twigs or branches, floral wire, scissors, and a hot glue gun. Start by gluing the pine cones to the twigs or branches in a visually appealing arrangement.
Next, consider adding candles or flowers for extra ambiance. To add candles, simply place them within the pine cone arrangement, securing them with floral wire if needed. For a more rustic look, use pillar candles in mercury glass holders or apothecary jars filled with evergreen sprigs and pine cones. Alternatively, add some dried flowers like baby’s breath or wheat to create a softer, more whimsical centerpiece.
Tips for making your pine cone centerpieces truly special include varying the size and texture of the pine cones, using different types of greenery like fir branches or eucalyptus, and adding decorative accents like ribbons or berries. By following these simple steps and experimenting with different materials, you’ll create a beautiful centerpiece that’s sure to become a family heirloom.
Pine Cone Gift Ideas
Need some inspiration for unique and thoughtful gifts? We’ve got you covered with these creative pine cone gift ideas that kids will love making.
How to Create a Pine Cone Gift
Creating a pine cone gift is a thoughtful and unique way to show loved ones you care. To make a potpourri-filled jar with a pine cone decoration on top, start by gathering materials such as small glass jars, dried flowers or potpourri mix, decorative twine or ribbon, and of course, pine cones.
Begin by filling the jar about 2/3 full with your chosen potpourri mixture. You can use store-bought mixes or create your own blend using dried flowers like rose petals, lavender buds, and cinnamon sticks. Next, place a small pine cone on top of the jar, securing it with a decorative twine or ribbon.
Add some extra flair by sprinkling a few decorative pine cones around the base of the jar or attaching a gift tag with a personalized message. This thoughtful gift is perfect for teachers, neighbors, or friends and family members who appreciate a touch of nature in their home decor.
Tips for Personalizing Your Gifts
When it comes to making pine cone gifts even more special, personalizing them with names or messages can make all the difference. Think about it – a gift that’s tailored to the recipient’s personality or name is something they’ll cherish for years to come.
To add a personalized touch to your pine cone crafts, consider using paint, markers, or even stickers to write the person’s name on the gift. You can also use glue to attach a small tag or label with their name and a special message. For example, if you’re making gifts for siblings, you could use a fun marker to write “Buddy” or “Best Friend” next to each child’s name.
Another idea is to incorporate personal interests or hobbies into your design. If the recipient loves a particular sports team or hobby, you can use pine cones in their favorite color to create a matching gift. You can also add small embellishments like beads, sequins, or glitter to make it even more unique. Remember, the key is to have fun and be creative – your child’s handmade gift will always be treasured, no matter how simple it may seem!
Troubleshooting and Safety Precautions
When working on your pine cone crafts, things might not always go as planned. This is where our troubleshooting guide comes in – to help you navigate any sticky situations!
Common Issues with Pine Cone Crafts
When working with pine cones for crafts, you may encounter some common issues that can be frustrating. One of the main problems is dealing with excess pine resin, which can stain surfaces and create a sticky mess. This can happen when you’re preparing or gluing the pine cones together. To minimize this issue, make sure to clean your work surface thoroughly before starting, and use a small brush to gently remove any excess glue or resin.
Another common problem is that the glue may not stick well to the pine cone’s rough surface. You can try using a hot glue gun with a smaller nozzle to get into the nooks and crannies of the pine cone. Alternatively, you can use a spray adhesive specifically designed for craft projects, which will adhere better to the pine cone’s texture.
It’s also essential to work in a well-ventilated area when using adhesives or other chemicals that might release fumes.
Safety Tips for Working with Kids and Materials
When working with kids on pine cone crafts for Christmas, safety should always be the top priority. To ensure a safe crafting experience, it’s essential to handle materials with care and take preventive measures against injuries.
Start by preparing a clutter-free workspace where kids can move around comfortably. Make sure all materials, including pine cones, glue, scissors, and paint, are within reach but out of their immediate grasp. This will prevent accidents caused by overreach or knocking over supplies.
Supervise children closely when handling sharp objects like scissors and craft knives. Demonstrate proper cutting techniques and ensure they understand how to hold the tool correctly. For younger kids, consider using blunt-tipped scissors or providing assistance with more complex tasks.
Additionally, teach kids how to properly handle pine cones, which can be slippery and cause falls. Encourage them to wash their hands before and after handling materials to prevent germ transfer. By following these simple safety tips, you’ll create a fun and secure environment for your little ones to express their creativity this holiday season.
Frequently Asked Questions
Can I use fresh pine cones instead of artificial ones?
Yes, you can definitely use fresh pine cones for your crafts! Just make sure to clean and dry them thoroughly before using. However, keep in mind that they might not last as long as artificial ones, especially if exposed to moisture or direct sunlight.
How do I store pine cone crafts after the holiday season?
To preserve your beautiful pine cone crafts, store them in a cool, dry place away from direct sunlight. You can also consider using acid-free tissue paper or cloth to wrap them and keep dust off. This way, you’ll be able to enjoy your treasured keepsakes for years to come.
Can I make pine cone crafts with kids of different ages?
Absolutely! Pine cone crafts are perfect for multi-age activities, as they cater to various skill levels and interests. For younger children, focus on simple projects like glue-on pine cones or painted pine cones. Older kids can try more complex designs, like pine cone garlands or wreaths.
How do I ensure my pine cone crafts don’t become a fire hazard?
To avoid any potential risks, use caution when working with pine cones and decorations that involve lights or open flames. Choose LED candles or fairy lights instead of real ones, and keep an eye on children while they’re crafting to prevent accidents.
Can I customize pine cone gifts for specific recipients?
Yes, you can definitely personalize your pine cone crafts as gifts! Consider adding a special message or the recipient’s name using paint or markers. You can also tailor the design and materials according to their interests or favorite colors.