
As the holiday season approaches, we’re on the lookout for fun and creative ways to get our little ones involved in the festivities. One of the most wonderful things about Christmas is the opportunity to connect with nature and create something truly special with our own hands. That’s why pinecone Christmas crafts are an absolute delight – not only do they make perfect gifts or decorations, but they’re also a great way to teach kids about the beauty of natural materials.
In this post, we’ll explore some easy and entertaining ways for your kiddos to create stunning ornaments, wreaths, garlands, and more using nothing but pinecones. From simple designs to more intricate projects, you’ll find something to spark their creativity and make the holiday season even brighter. So grab some pinecones, glue, and glitter, and get ready to unleash your mini makers’ inner artists!
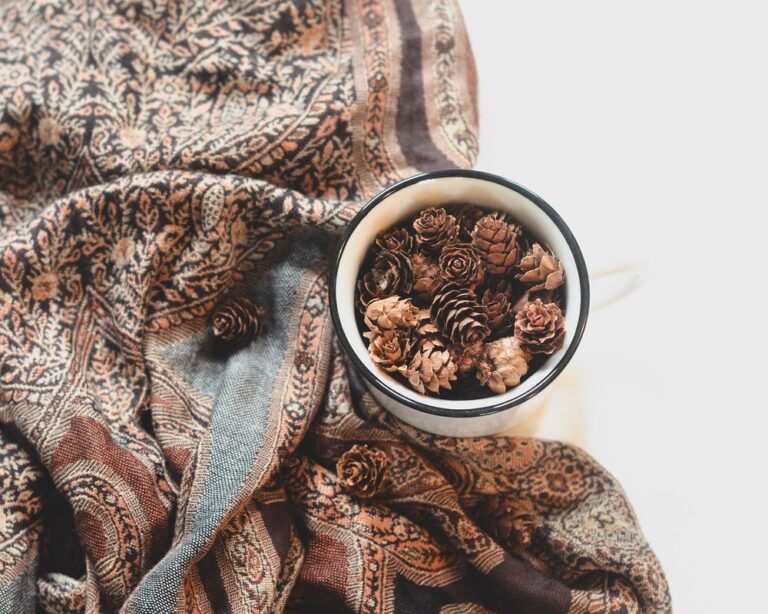
Introduction to Pinecone Christmas Crafts
Get ready to create some magical pinecone crafts that will bring your home to life, and I’ll show you how to make them in just a few simple steps.
What Makes Pinecones Perfect for Christmas Decorations?
Pinecones are a natural, inexpensive, and eco-friendly material that can add a rustic touch to any Christmas decoration. One of the best things about pinecones is their versatility – they can be used in a variety of craft projects to create unique and eye-catching decorations.
For kids, working with pinecones is not only fun but also educational. It teaches them about the importance of recycling and upcycling materials that might otherwise go to waste. By using pinecones in crafts, kids can develop their creativity while learning valuable lessons about sustainability.
When it comes to Christmas decorations, pinecones can be used in a number of ways. They can be painted, glued onto wreaths or garlands, or even used as a base for other materials like glitter, sequins, or beads. The possibilities are endless! For example, you could create a beautiful pinecone centerpiece by gluing pinecones to a candle holder and topping it off with some evergreen branches.
To get started, simply collect some pinecones from your backyard (or purchase them at a craft store) and let the creativity begin! With a little bit of imagination and some basic crafting supplies, kids can create beautiful and unique pinecone Christmas decorations that will make their home shine.
Why Kids Will Love Making Pinecone Crafts
Making pinecone crafts with kids is an absolute delight! It’s a wonderful way to encourage their creativity and imagination while exploring nature. The excitement of decorating natural materials like pinecones is infectious, and kids will love the process of transforming them into beautiful Christmas decorations.
The beauty of pinecones lies in their unique shape and texture, making each one a work of art waiting to happen. Kids can experiment with different colors, textures, and embellishments to create truly one-of-a-kind pieces. Imagine dipping pinecones in glittery paint, decorating them with ribbons or beads, or even using natural materials like twigs and leaves to create intricate designs.
The best part? It’s not just about the end result – it’s about the journey itself. Kids will have a blast exploring the process of creating something from scratch, making mistakes, and learning as they go. And let’s be honest, who doesn’t love the satisfaction of seeing their child’s face light up when they see their finished masterpiece? With pinecone crafts, the possibilities are endless, and the memories you’ll create with your little ones will last a lifetime!
Simple Pinecone Ornaments for Kids
Get creative and cozy up with your little ones as we dive into a delightful way to repurpose pinecones into adorable ornaments that kids will love making. This simple project is perfect for a fun winter activity!
Basic Pinecone Ornament Tutorial
Making a basic pinecone ornament is a fun and easy activity that kids can enjoy during the holiday season. To get started, you’ll need just a few simple materials: a pinecone, some string or twine, glue, and a few decorations like beads or glitter (optional).
First, help your child choose a pinecone that they like best. You can use any type of pinecone for this project, but smaller ones work better for ornaments.
Next, apply a small amount of glue to the top of the pinecone, just where the stem meets the cone. This will serve as the “hanger” for your ornament. Then, wrap some string or twine around the stem, leaving enough room to tie a knot at the end. This will secure the hanger in place.
Now it’s time to add some decorations if you like! Help your child thread beads onto the string or sprinkle some glitter over the glue. Once everything is dry and secure, your pinecone ornament is complete. Hang it on the Christmas tree or give it as a gift – either way, it’s sure to bring a smile to someone’s face.
Decorating Pinecone Ornaments with Glitter and Other Embellishments
Decorating pinecone ornaments with glitter and other embellishments is where the magic happens! Kids love getting creative with different textures and colors, making this a great activity to encourage their imagination. To get started, gather a variety of craft supplies like glue, scissors, glitter, sequins, and ribbons.
Let’s start with glitter – a kid’s favorite! You can either glue individual pinecones onto a surface or attach them together in clusters. Then, let the kids sprinkle away with different colors and types of glitter. From fine to chunky, there are plenty of options to suit their taste. Another fun idea is to create patterns using sequins or stickers – kids love making symmetrical designs.
To add an extra touch, consider using hot glue to attach small bows, beads, or other embellishments. The key is to let the kids’ creativity shine through! Encourage them to experiment and mix-and-match different materials for a unique look. With these simple steps, your little ones will create one-of-a-kind pinecone ornaments that they’ll treasure all year round.
Pinecone Wreaths: A Fun Christmas Craft Project
Get creative and cozy up with our pinecone wreath tutorial, a fun and easy DIY project perfect for kids to help make your home festive this holiday season. We’ll guide you through it step by step!
Making a Pinecone Wreath with Kids
Creating a beautiful pinecone wreath with kids is an excellent way to get them involved in the holiday decorating process. To make this project a success, gather some essential materials like floral wire, hot glue gun, and plenty of pinecones in various sizes.
Start by preparing the workspace by covering it with newspaper or a tablecloth to protect against any mess. Show your kids how to bend the floral wire into a circular shape, forming the base of the wreath. Encourage them to gently tie the ends together to create a sturdy loop.
Next, help your child apply a small amount of hot glue to the back of a pinecone and attach it to the wreath form. This is where patience comes in – working with hot glue can be tricky for little hands. To make it more manageable, try using smaller amounts or even providing them with pre-glued pinecones.
As you work together, teach your child about symmetry by placing larger pinecones towards the bottom and gradually decreasing their size as you move up the wreath. This will create a visually appealing and balanced design. With practice, they’ll become experts at creating stunning pinecone wreaths in no time!
Adding Decorations to the Pinecone Wreath
Now that you’ve created your pinecone wreath base, it’s time to add some festive decorations. This is where kids can get really creative and make their wreaths truly special. One of the simplest yet most effective ways to decorate a pinecone wreath is with ribbons or bows. You can use traditional red and green stripes for a classic look, or opt for more modern patterns like polka dots or florals.
You can tie the ribbons directly onto the wreath form using a simple bow or use floral wire to attach them at an angle for added visual interest. Don’t be afraid to experiment with different textures by incorporating velvet, satin, or even yarn into your design. For example, you could create a mini garland with small pinecones and wrap it around the wreath for extra dimension.
To take it up a notch, kids can also use other embellishments like pine needles, dried flowers, or even artificial berries to add depth and color to their wreaths. Just remember, the key is to have fun and be creative! Encourage your little ones to mix and match different materials and textures to create a truly one-of-a-kind masterpiece.
Pinecone Garland: A Festive Christmas Craft
Create a stunning pinecone garland for your home’s holiday decor by learning how to make one using just a few simple materials and some creative flair. Kids will love helping you craft this festive Christmas decoration!
How to Make a Pinecone Garland
To create a stunning pinecone garland, gather a variety of materials: string or twine, hot glue gun, scissors, and an assortment of pinecones in different sizes. Begin by threading a few pinecones onto the string, leaving about 2-3 inches between each one.
Next, use your hot glue gun to attach any loose pinecones to the string, making sure they’re securely fastened. You can also add some decorative elements like ribbons, beads, or artificial flowers to give your garland a more festive look. If you want to get creative, try arranging the pinecones in a pattern or alternating between small and large ones for added visual interest.
To add some extra texture and depth, sprinkle some evergreen branches, eucalyptus leaves, or dried flowers throughout the garland. Finish off your masterpiece by tying a knot at both ends of the string to keep everything in place. Hang your pinecone garland above your mantel, along a staircase, or across a room for a beautiful and rustic holiday decoration. With these simple steps, you’ll be creating a stunning pinecone garland in no time!
Tips for Hanging the Pinecone Garland
Now that you’ve created your beautiful pinecone garland, it’s time to display it and add some extra festive flair to your home. Hanging the garland is a crucial step, as it can make or break the overall ambiance of your decor.
To start, decide where you’d like to hang your garland. Windows are a great option, especially if they have a pretty view outside. Simply tie one end of the garland to the window frame with some twine or ribbon, and then wrap the rest around the rod to create a beautiful display. You can also add some extra greenery like eucalyptus or ferns to fill in any gaps.
Another great spot for your pinecone garland is along your mantel. This adds a lovely touch of warmth and coziness to your living room. To hang it, simply tie one end to the mantel and then drape the rest over the sides, making sure to fluff out any tangled areas. You can also add some candles or fairy lights underneath for extra ambiance.
Lastly, if you have a long wall that needs some decorating, consider hanging your pinecone garland vertically. This creates a stunning focal point in any room and is especially effective in hallways or staircases. Use some strong adhesive putty to hang the garland at an angle, making sure it’s secure and won’t fall off.
Remember, the key to displaying your pinecone garland is to have fun with it! Don’t be afraid to experiment with different arrangements and layouts until you find one that works for you.
More Complex Pinecone Crafts: Ideas for Older Kids
For older kids, we’ve got even more creative and challenging pinecone crafts to try, perfect for fine-tuning those crafting skills. From intricate designs to complex techniques, get ready to be inspired!
Making a Pinecone Christmas Tree with Kids
Creating a beautiful pinecone Christmas tree with kids is an excellent way to encourage their creativity and get them into the holiday spirit. To start, gather some cardboard sheets, hot glue gun (with adult supervision), and other craft supplies like scissors, ribbons, and decorative items.
Begin by cutting out a triangular shape from the cardboard sheet to create the base of the tree. Help your kids arrange the pinecones on the base in a symmetrical pattern, starting with the largest ones at the bottom and working their way up. Use hot glue to secure each pinecone in place, making sure not to touch the hot glue nozzle with your fingers.
As you work on the tree’s structure, encourage your kids to get creative with the arrangement of pinecones, ribbons, and other decorations. They can use this opportunity to practice their spatial reasoning and problem-solving skills while having fun at the same time. To add a personal touch, let them choose some decorative items like glitter, sequins, or small bells to attach to the tree.
Once you’ve completed the main structure of the tree, step back and admire your kids’ handiwork. They can then place it on their Christmas table centerpiece, mantel, or even use it as a gift topper for presents. This project is an excellent way to spend quality time with your kids while fostering their creativity and fine motor skills.
Creating a Pinecone Advent Calendar with Kids
Get your kids involved in counting down to Christmas with a fun and interactive advent calendar made from pinecones. This project is not only an exciting way to build anticipation for the holiday season but also offers a range of educational benefits.
To create this unique advent calendar, you’ll need paper bags, paint or markers, glue, scissors, and of course, plenty of pinecones. Start by decorating each bag with your child’s name or initials using paint or markers. This step allows them to practice their fine motor skills while expressing their creativity.
Next, fill each bag with a small treat or activity, such as stickers, small toys, or puzzles. Seal the bags and attach a number label to each one using glue or tape. To incorporate pinecones, use a hot glue gun (with adult supervision) to attach them to the top of each bag, creating a decorative “tree” effect.
This project is an excellent opportunity for kids to develop problem-solving skills, as they’ll need to figure out how to attach the pinecones and bags together. Additionally, it encourages counting and basic math concepts as they work their way through the calendar. By participating in this craft, your child will not only have a blast creating something special but also learn valuable skills along the way.
Tips and Safety Precautions for Making Pinecone Crafts
To make sure your little ones stay safe while crafting, we’ll cover some essential tips on handling pinecones and other materials. This section will also highlight important safety precautions to take at home.
How to Handle Pinecones Safely
When working with pinecones, especially when crafting with kids, it’s essential to handle them safely to avoid any potential harm. One of the primary concerns is allergies and skin irritation. Some people may be allergic to certain types of pollen or sap found on pinecones.
To minimize this risk, start by wearing protective gloves while handling pinecones. This will prevent any direct contact with the sap or pollen that might cause an allergic reaction. If you have sensitive skin, consider applying a thin layer of petroleum jelly or hand cream before touching the pinecones to create a barrier between your skin and the sap.
Also, be sure to wash your hands thoroughly after handling pinecones, especially if you’ve touched any sap or pollen. This will help prevent the risk of transferring allergens to other parts of your body or spreading it to others. For kids, make sure they understand the importance of washing their hands afterward and encourage them to do so as soon as possible.
When storing pinecones for later use in crafts, keep them in an airtight container to maintain freshness and prevent any potential mess.
General Craft Safety Rules
When working with materials like glue, scissors, and hot glue guns, it’s crucial to follow basic craft safety rules to ensure a fun and safe experience for kids. Start by setting up a dedicated workspace where kids can work without distractions or hazards nearby.
First, always supervise young children when using sharp objects or tools, such as scissors, knives, or craft cutters. Teach them how to hold the tool correctly, with their dominant hand guiding it and their other hand providing support. For younger kids, consider using blunt-tipped scissors or child-friendly tools.
When working with glue, make sure kids understand not to eat or touch their eyes or face after applying glue. Also, keep a damp cloth handy to wipe off any excess glue from surfaces. When using hot glue guns, always have adult supervision and ensure the area is clear of flammable materials. Make sure kids wear protective gloves to prevent burns.
Remember to teach kids how to properly clean up spills immediately to avoid accidents. Encourage them to wash their hands thoroughly after craft time.
Conclusion: Encouraging Creativity with Pinecone Crafts
Now that you’ve explored all these fun and creative pinecone Christmas crafts, it’s time to encourage your little ones to keep exploring their imagination.
Final Thoughts on the Benefits of Pinecone Crafts
As we conclude our exploration of pinecone crafts for kids, it’s clear that these projects offer far more than just a fun holiday activity. They provide a wealth of educational benefits and creative value that can last long after the craft session is over.
By working with pinecones, children develop their fine motor skills through the process of gluing, twisting, and arranging the materials. This hands-on approach also introduces kids to basic geometry concepts, such as shape recognition and measurement. Additionally, using natural materials like pinecones sparks an interest in science and nature, encouraging kids to explore the outdoors.
The creative possibilities with pinecone crafts are endless, and this is where the real magic happens. By allowing children to express themselves through art, you’re nurturing their imagination and creativity. Encourage them to experiment with different textures, colors, and patterns, and watch as they bring their ideas to life. Don’t be afraid to try new projects together – it’s a great way to bond and create lasting memories.
Inspiring Kids to Create More Christmas Crafts
As you’ve seen throughout this post, pinecone crafts are an excellent way to encourage kids’ creativity and connection with nature. But why stop at just a few projects? With some inspiration and guidance, you can nurture their love for crafting with natural materials all year round.
To start, try setting up a designated craft station in your home or backyard using items like cardboard boxes, baskets, and bins filled with pinecones, leaves, twigs, and other natural treasures. This will create a fun and inviting space for kids to explore and get creative.
You can also encourage kids to collect their own materials on nature walks or hikes, teaching them about the different textures, shapes, and smells of various plants and trees. For example, you could try making a collage using fallen leaves or creating a mobile with twigs and pinecones.
To take it a step further, consider challenging your child to come up with their own unique craft idea using natural materials. This will not only inspire their creativity but also teach them valuable skills like problem-solving and critical thinking.
Frequently Asked Questions
Can I use artificial pinecones as an alternative to real ones?
Yes, you can definitely use artificial pinecones for your Christmas crafts, especially if you’re looking for a more durable option or want to avoid any potential allergies associated with real pinecones. However, keep in mind that artificial pinecones might not have the same natural charm and texture as their real counterparts.
How do I dry pinecones quickly and safely?
To speed up the drying process without compromising the quality of your pinecones, try tying them in small bunches and hanging them upside down in a warm, dry place. You can also use a food dehydrator on a low setting to dry larger quantities of pinecones.
Can I make pinecone crafts with younger children (under 4 years old)?
While pinecone crafts are generally suitable for kids, they do require some level of fine motor skills and supervision. If you’re planning to involve very young children in the craft-making process, consider simplifying the projects or adapting them to their age and abilities.
How can I reuse and repurpose pinecone decorations after Christmas?
Pinecones make fantastic reusable decorations for future holidays and events. Simply store them carefully after Christmas and incorporate them into your next festive project – perhaps as a springtime centerpiece or even as part of a winter solstice craft!
Can I use other types of cones, such as fir or cedar, in my pinecone crafts?
While pinecones are the most traditional choice for Christmas crafts, you can experiment with using other types of cones like fir or cedar. However, keep in mind that these might have a stronger scent and require special handling due to potential allergenic properties or durability concerns.
What if I don’t have access to fresh pinecones during the off-season? Can I substitute them with artificial ones?
Yes, you can use artificial pinecones as a substitute for real ones, especially when fresh pinecones are not readily available. Just be sure to check their quality and durability before using them in your craft projects.
How do I make my pinecone crafts more durable and long-lasting?
To extend the lifespan of your pinecone crafts, consider using hot glue instead of regular adhesive for added stability and strength. Additionally, apply a clear coat or sealant to protect the decorations from dust and moisture damage.