
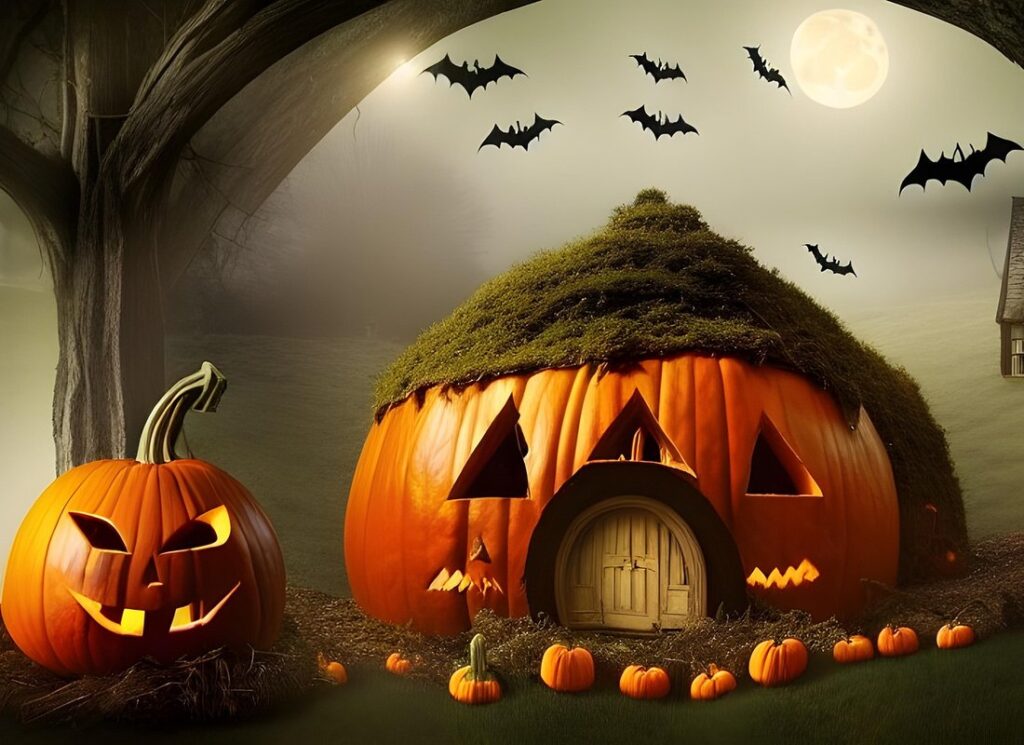
Pumpkin season is here, which means it’s time to get creative with your little ones! What better way to celebrate than by making some beautiful pumpkin paintings together? Not only are these art projects a great way to reuse and recycle, but they’re also an excellent opportunity for kids to express their imagination and have fun while getting messy. As we delve into the world of pumpkin painting, you’ll learn how to prepare your little ones with the right materials, techniques, and safety tips to create stunning works of art that will last a lifetime. In this step-by-step guide, we’ll cover everything from choosing the perfect pumpkins to showcasing their finished masterpieces, so get ready to unleash your child’s inner artist!
Introduction to Pumpkin Painting
Get ready to unleash your child’s creativity as we dive into the world of pumpkin painting, where imagination and artistry come together! This section will guide you through the basics.
Benefits of Pumpkin Painting for Children’s Development
Pumpkin painting is not just a fun fall activity for kids; it also offers numerous benefits for their development. One of the most significant advantages is that it enhances fine motor skills. By using small brushes and paints, children practice controlling their hand movements and finger dexterity, which are essential for writing, drawing, and other daily activities.
Pumpkin painting also fosters creativity and self-expression in children. They can let their imagination run wild with designs, patterns, and colors, developing their problem-solving skills and critical thinking. For instance, a child might experiment with different brushstrokes to create texture or mix contrasting colors to achieve unique hues.
To maximize the benefits of pumpkin painting for your child’s development, try these tips: Use washable paints and brushes to minimize mess and stress. Encourage children to explore various techniques, such as dripping or splattering paint, to promote creativity. Lastly, let them take ownership of their design by giving it a personal meaning or message.
By incorporating pumpkin painting into your fall activities, you’ll not only create beautiful decorations but also help your child develop essential fine motor skills and unleash their creative potential.
Materials Needed for a Successful Project
When it comes to creating a masterpiece with pumpkin painting for kids, having the right materials is crucial. To ensure a successful project, you’ll want to gather the following essential supplies:
Start by selecting a few high-quality pumpkins that are specifically designed for painting. These can be found at most craft stores or online. It’s also a good idea to have an assortment of paint colors and types on hand. Water-based acrylic paints work well for pumpkin painting, as they’re easy to clean up and dry quickly.
In addition to paints, you’ll need some basic art supplies like brushes in various sizes and shapes. A variety of brushes will allow your child to experiment with different techniques and styles. Don’t forget to pick up a few smocks or old shirts to protect your child’s clothes from paint spills.
Other materials that can enhance the experience include a surface for painting, such as a tablecloth or paper, and some fun design stencils or templates to inspire creativity. By having these materials on hand, you’ll be well-prepared to help your child create a beautiful and unique pumpkin masterpiece.
Preparing Your Pumpkins for Painting
Before you start painting, make sure your pumpkin is completely dry and clean of any dirt or debris that might affect the paint’s adhesion. This simple step will ensure a beautiful finish!
Choosing the Perfect Pumpkin
When it comes to choosing the perfect pumpkin for painting, there are several factors to consider. Size is an important factor, as you want a pumpkin that’s big enough to handle easily, but not so big that it’s unwieldy. A medium-sized pumpkin, typically between 5-10 pounds, is a good starting point.
Shape also matters – a symmetrical, rounded pumpkin will provide a smoother surface for painting than one with lumps or irregularities. Consider a pumpkin with a slightly oval or teardrop shape to give your child more creative freedom when designing their masterpiece.
Texture can also impact the painting experience – look for pumpkins with smooth skin that won’t easily absorb paint. Avoid those with soft spots, ridges, or excessive bumps, as these will be difficult to cover evenly.
Ultimately, the best pumpkin for painting is one that’s sturdy enough to support your child’s creative endeavors without becoming too heavy or unwieldy. When in doubt, choose a smaller, more manageable size and encourage your child to get creative with their design!
Cleaning and Drying the Pumpkins
Before you can unleash your child’s creativity on those pumpkins, they need to be prepared for painting. Cleaning and drying them thoroughly is a crucial step that often gets overlooked, but it makes all the difference in the final result. A dirty or damp pumpkin can lead to uneven paint adhesion, streaks, and even mold growth.
To clean your pumpkins, gently scrub them with a soft-bristled brush and mild soap solution under running water. Avoid using harsh chemicals or abrasive cleaners that can damage the skin. Rinse thoroughly to remove any soap residue. Next, use a clean towel to dry the pumpkin, making sure to get into all the crevices and ridges.
It’s essential to dry your pumpkins completely before painting. You can speed up the process by placing them in a single layer on a wire rack or paper towels, allowing air to circulate around each one. This helps prevent moisture from accumulating and promotes even drying. Once dry, your pumpkins are ready for their artistic makeover. By taking this extra step, you’ll be rewarded with vibrant, long-lasting paint jobs that will make your little ones proud of their creations.
Design Ideas and Inspiration
For a fun and creative touch, check out these fantastic design ideas and inspiration for kids’ pumpkin paintings that are sure to impress. Let your little artists get started!
Classic Designs: Jack-o’-Lanterns and More
One of the most iconic and enduring designs for pumpkin painting is the classic jack-o’-lantern face. Kids love creating these spooky yet adorable faces, and with a few simple guidelines, they can achieve impressive results. Start by drawing on a basic shape for the eyes and mouth, using a pencil or marker to guide your design. Add some curved lines for the nose and mouth, and don’t forget to create some dimension by adding shading.
Beyond jack-o’-lantern faces, kids can also have fun with seasonal motifs like leaves, acorns, and even simple messages like “Happy Halloween” or “Boo!” Use a variety of paint colors to add depth and texture to your design. For example, you could use shades of orange and yellow for the pumpkin itself, while using darker shades for the shadows. This creates a sense of dimensionality that adds visual interest to your painting.
Remember, it’s all about having fun with the process! Encourage kids to get creative and try out different designs – who knows what amazing creations they’ll come up with?
Unconventional Designs: Encouraging Creativity
Get ready to unleash your child’s inner artist with these unconventional pumpkin painting designs that will encourage creativity and self-expression. Who says pumpkins have to be painted with traditional fall colors like orange and yellow? Let’s break the mold and try something new!
For instance, you can create a masterpiece inspired by the ocean. Use shades of blue and green paint to create waves, seaweed, or even a giant squid on your pumpkin. If your child loves space, why not turn their pumpkin into a galaxy with starry night skies, planets, and comets? You can also paint a beautiful cityscape with towering skyscrapers, bustling streets, or even a magical kingdom.
To encourage creativity, try using unconventional materials like sponges, stencils, or even household items like toothbrushes to create unique textures and patterns. For example, use a sponge to create a soft, cloudy effect on your pumpkin’s surface or use a toothbrush to paint intricate details like trees or flowers. The possibilities are endless, so don’t be afraid to experiment and come up with your own one-of-a-kind design!
Painting Techniques for Kids
Now that you’ve carved out the perfect pumpkin, let’s get creative and learn some fun painting techniques to add an extra layer of personality to your little ones’ designs! We’ll share some easy steps to make their masterpieces truly one-of-a-kind.
Exploring Different Brushstrokes and Textures
Now that you’ve got your pumpkins all sketched out and primed with gesso, it’s time to bring them to life with some amazing brushstrokes and textures! Exploring different techniques will not only make your painting more interesting but also help develop your child’s fine motor skills and creativity.
Let’s start with stippling – a fun technique where you create images using small dots. To try stippling, have your child dip their brush in paint and tap it gently on the paper to create tiny dots. They can use this technique to add texture and depth to their pumpkin by creating rows of dots or swirling patterns.
Next up is dotting – similar to stippling but with a slightly larger brush. Your child can use this technique to fill in large areas or add details like eyes, stems, or leaves. Swirling is another great technique that’s perfect for adding movement and energy to your pumpkin painting. Simply rotate the paper as you paint, creating smooth, swirling patterns.
Remember, the key to mastering these techniques is practice – so encourage your child to experiment with different brushstrokes and textures until they find what works best for them!
Tips for Achieving Vibrant Colors and Patterns
When it comes to creating vibrant colors and patterns on pumpkin paintings, kids often get excited about experimenting with different hues. To help them achieve their desired color schemes and patterns, choose paints specifically designed for painting pumpkins. These eco-friendly acrylic or tempera paints are perfect for kids, as they’re easy to clean up and come in a variety of bright, bold colors.
To create unique patterns on the pumpkin, consider using stencils or stickers featuring leaves, vines, or other fall-inspired designs. You can also let your child’s creativity shine by using household items like sponges, foam brushes, or even their fingers to create textures and patterns. For instance, a sponge can be used to dab paint onto the pumpkin in circular motions for a fun, marbled effect.
To add an extra layer of excitement, try mixing different colors together on a palette to create new shades and hues. This will allow your child to experiment with ombre effects or blend colors for a one-of-a-kind design. With these tips and tricks, kids can unleash their artistic side and create stunning pumpkin paintings that are sure to brighten up any room!
Displaying Your Masterpieces
Now that you’ve created a masterpiece, let’s show it off! This section shares creative ideas for displaying and showcasing your little one’s pumpkin paintings.
Ideas for Showcasing Painted Pumpkins
Now that you’ve created some beautiful painted pumpkins with your kids, it’s time to showcase them proudly! Coming up with creative ways to display these masterpieces is just as much fun as the painting process itself. Here are some fantastic ideas for arranging and decorating your painted pumpkins:
To create a warm and inviting atmosphere, group your painted pumpkins together on a porch or entryway table. Add some greenery like eucalyptus or ferns to bring in a natural touch. You can also incorporate candles, lanterns, or string lights to add a magical ambiance. For a more rustic look, pile up your painted pumpkins with hay or straw and place them on a wooden crate or bench.
If you’re looking for something more unique, try transforming your painted pumpkins into a beautiful centerpiece for your dining table. Simply arrange them in a decorative vase or container, add some fall-themed decorations like acorns or pinecones, and you’ll have a stunning conversation starter.
Don’t forget to get creative with the display itself! Use twine, ribbons, or garlands to tie together your painted pumpkins and add a pop of color. You can also incorporate other seasonal elements like dried corn husks, fall leaves, or artificial flowers to create a beautiful arrangement that will be the talk of the town.
Preserving Your Artwork: Tips for Longevity
When it comes to pumpkin paintings created by kids, preserving them for long-term display can be a challenge. However, with the right techniques and materials, you can ensure they remain vibrant and intact for years to come.
One of the most effective ways to extend the life of your pumpkin painting is to use a sealant or varnish. These products create a protective barrier between the artwork and the environment, shielding it from dust, moisture, and UV light damage. When choosing a sealant or varnish, look for ones specifically designed for watercolor or acrylic paintings.
To apply a sealant or varnish, start by gently cleaning the painting with a soft brush to remove any loose particles. Next, apply a thin layer of the product using a foam brush or soft cloth. Make sure to follow the manufacturer’s instructions and test the product on an inconspicuous area first.
It’s also essential to store your pumpkin paintings in a dry, cool environment, away from direct sunlight. Avoid storing them in attics or basements, as these areas can be prone to moisture buildup. By taking these simple steps, you’ll be able to enjoy your child’s artwork for years to come.
Safety Precautions and Cleanup
Before moving on to more fun projects, let’s make sure you’re prepared for any messes that might happen. We’ll go over some essential safety precautions and cleanup tips to keep everyone happy and tidy!
Ensuring a Safe Painting Experience
When working with pumpkin painting for kids, it’s essential to take necessary safety precautions to ensure a fun and safe experience. To start, cover your work surface with newspaper, a plastic tablecloth, or a drop cloth to protect against paint spills and stains. You can also place a piece of cardboard under the paper to make cleanup easier.
Before beginning the painting process, put on some old clothes or an apron that you don’t mind getting messy. This will save you from worrying about cleaning up any accidents. If using washable paints, like tempera or watercolor, you can let your little ones get creative without stressing too much about stains. Make sure to have soap and water nearby for easy cleanup.
To prevent paint from getting on the pumpkin itself, use a layer of newspaper or paper towels as a barrier between the pumpkin and the painting surface. You can also consider using washable stickers or stencils to help your kids stay within the boundaries and avoid making a mess with their brushstrokes.
Cleaning Up After the Project
When it’s time to clean up after your pumpkin painting project with kids, it’s essential to do so safely and responsibly. Start by gathering all the materials used during the activity, including paper towels, paintbrushes, smocks, and of course, the painted pumpkins.
Properly dispose of any waste generated during the project, such as empty paint containers, paper plates, and torn smock pieces. Be sure to rinse and recycle any plastic or metal items whenever possible. Discard any leftover food items or trash in the designated bins.
Clean up any spills immediately using a mixture of soap and water. If you’re working with a large group, assign a few volunteers to help with this task. For tougher stains on clothes or surfaces, use a gentle stain remover. Finally, wash your hands thoroughly after handling paint and clean all painting tools according to the manufacturer’s instructions.
By following these simple steps, you’ll not only minimize waste but also ensure that everyone involved in the project stays safe and healthy.
Frequently Asked Questions
Can I use regular paint on my pumpkins, or do I need special pumpkin-specific paints?
Yes, you can use regular paint on your pumpkins, but it’s recommended to use water-based or acrylic paints specifically designed for ceramics and pumpkins. These types of paints are more durable and less likely to chip or fade over time.
How long does it take for painted pumpkins to dry completely?
It typically takes 24 to 48 hours for painted pumpkins to dry completely, depending on the thickness of the paint and environmental conditions. To ensure they’re fully dry, wait at least 2-3 days before displaying or handling them.
Can I use a sealant or varnish to protect my pumpkin artwork from fading?
Yes, using a clear sealant or varnish can help protect your painted pumpkin art from fading and extend its lifespan. Apply the sealant according to the manufacturer’s instructions, making sure it doesn’t compromise the paint’s adhesion.
How do I prepare my pumpkins if they’re not perfectly round or smooth?
You can still create beautiful pumpkin paintings even with imperfectly shaped pumpkins! To prepare them, gently clean and dry the surface, then use a mixture of water and sandpaper to smooth out any blemishes. This will help ensure better paint adhesion.
Can I reuse old, previously painted pumpkins for new designs?
Yes, you can definitely reuse old pumpkin paintings with new designs. Before repainting, make sure to clean the surface thoroughly, allowing it to dry completely between coats. This way, your child can create a new masterpiece on an existing base, promoting creativity and reducing waste.