
Are you looking for a fun way to encourage your kids’ creativity and independence? Teaching your little ones how to sew can be a great place to start. Not only is it a valuable life skill, but it’s also an excellent way to promote self-expression and confidence. With the right approach, sewing can become a enjoyable experience for both you and your child.
In this guide, we’ll show you how to introduce your kids to the world of sewing with beginner-friendly projects that are perfect for young hands. We’ll cover everything from safety tips and essential materials to tools and fun project ideas that will have your child’s imagination running wild. Whether you’re a seasoned crafter or a complete beginner, our guide is designed to get you and your child started on the path to sewing success together.
Choosing the Right Materials
When it comes to sewing projects for kids, selecting the right materials is crucial for their enjoyment and safety. Let’s explore some options that are suitable for young hands.
Types of Fabric Suitable for Kids’ Projects
When it comes to choosing fabric for kids’ sewing projects, there are several types to consider. Cotton is a popular choice because it’s soft, breathable, and easy to work with. It’s also a great option for beginners as it can be ironed easily and holds its shape well. For example, cotton voile or lawn fabrics are perfect for making flowy sundresses or rompers.
Polyester fabric, on the other hand, is often used for projects that require durability and ease of care. It’s stain-resistant and easy to clean, which makes it a great choice for busy kids who may not be able to keep up with regular washing. However, polyester can sometimes be scratchy or prone to pilling.
Another option is blends – fabrics made from a combination of cotton and polyester. These are often used in projects that require a balance between softness and durability. For instance, a blend of 60% cotton and 40% polyester would provide the best of both worlds. When choosing fabric for kids’ projects, make sure to opt for ones with a tight weave or twill construction to prevent fraying or snagging.
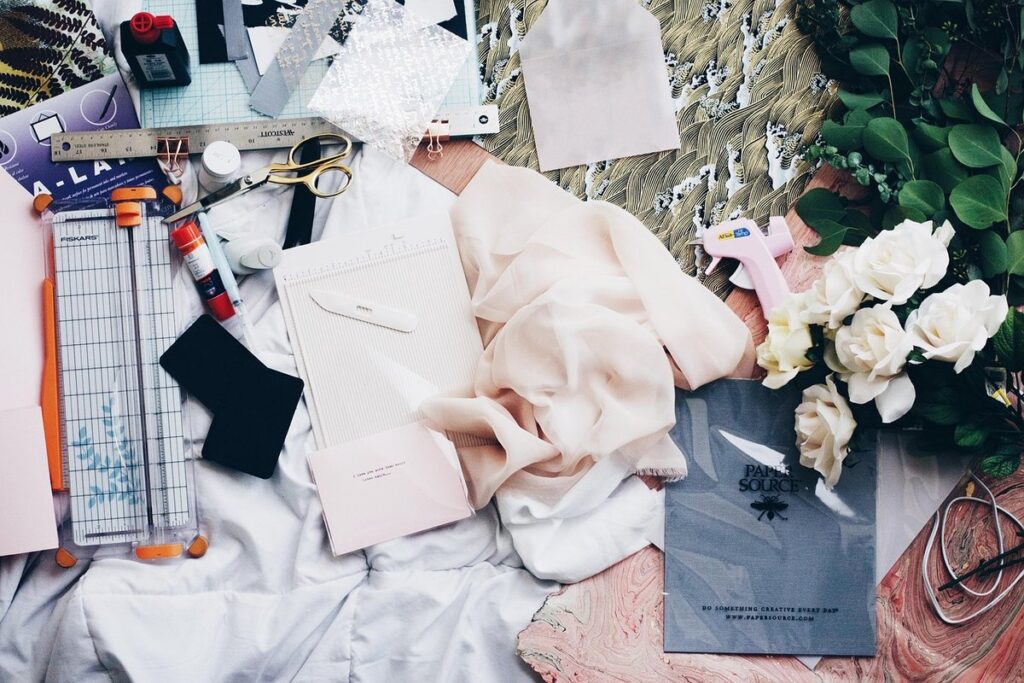
Essential Tools and Notions for Kids’ Sewing
When it comes to kids’ sewing, having the right tools and notions can make all the difference. It’s essential to provide them with the basic essentials that will help them navigate their projects with ease.
First and foremost, let’s talk about scissors. Kids need sharp, dedicated scissors specifically designed for cutting fabric, which is gentler on materials than regular household scissors. Opt for kid-friendly options like blunt-tipped or rounded-handle scissors to prevent accidents. As for pins, start with a small pack of thin, safety pins that won’t puncture skin.
In terms of needles, look for kid-sized sewing needles or blunt-tipped ones designed for beginners. These will reduce the risk of injury and make stitching easier. For threads, choose a variety pack of bright colors to keep things engaging and fun. When it comes to zippers, start with simple, easy-to-use zippers like separating or invisible zippers that require minimal threading.
When selecting tools and notions for your little ones, remember that bigger isn’t always better – especially when it comes to children’s hands. Opt for smaller sizes that fit comfortably in their grip, making tasks less overwhelming and more enjoyable.
Safety Precautions When Working with Fabric
When working with fabric and sewing machines, especially around children, safety should always be your top priority. It’s essential to create a safe environment that allows both you and the little ones to enjoy sewing without worrying about injuries.
To start with, make sure you wear protective gear such as goggles or safety glasses to shield your eyes from flying threads or debris. You should also tie back long hair to prevent it from getting caught in the machine or causing a tripping hazard. Loose clothing can be hazardous while working near sharp objects or machinery, so ensure that your clothes are securely fastened.
When sewing around children, keep them at a safe distance from the machine and make sure they understand what’s happening and why certain precautions are necessary. Explain to them how to behave safely near the sewing area, such as staying seated on a stool or chair, keeping their hands away from sharp objects, and not touching any electrical components.
Remember, it’s always better to err on the side of caution when working with fabric and machines. By following these basic safety precautions, you can create a fun and safe environment for both kids and adults alike to enjoy sewing together.
Simple Sewing Projects for Beginners
Let’s get started on some fun and easy sewing projects that are perfect for kids to try, from simple bags to adorable stuffed animals.
Easy-Peasy Pillowcase Project
To get started with our easy-peasy pillowcase project, you’ll need some basic sewing supplies, including a piece of fabric for the front and back of the pillowcase, some cotton thread, a sewing machine, scissors, pins, and a measuring tape. For this beginner-friendly project, we recommend using a rectangular-shaped pillow that’s about 20 inches wide by 30 inches long.
Let’s begin with step one: cutting out your fabric pieces. Place the front piece of fabric on top of the back piece, right sides together (meaning the wrong sides are facing out). Use a ruler or measuring tape to mark a straight line across both fabrics, aligned with the top edge of the pillowcase. Cut two identical rectangles along this marked line, making sure to cut accurately and smoothly.
Next, we’ll discuss how to customize your pillowcase with fun designs or appliques. This is where creativity comes in! You can use fabric paint, markers, or even iron-on transfers to add a personalized touch.
Fun Keychain or Bag Project
Let’s make some fun and functional accessories for our little ones with a simple keychain or bag project. This is an excellent way to introduce children to the world of sewing and give them a sense of accomplishment.
To start, let’s choose a cute fabric that will appeal to your child’s interests. You can opt for a fun character print or a bright solid color. Consider using cotton or canvas fabrics as they are easy to work with and suitable for beginners. Don’t forget to pick some coordinating thread and a few fun embellishments like buttons, beads, or embroidery floss.
For the keychain project, you’ll need a small piece of fabric (about 4″ x 6″), some interfacing, and a small bag of notions including a button, some thread, and a keyring. For the bag project, use a slightly larger piece of fabric (around 8″ x 10″) and add some straps or handles for carrying.
Let’s get creative! Use embroidery to add your child’s name or a cute message to their new accessory. You can also add some decorative stitches or patterns using the embroidery floss. To make it even more special, incorporate your child’s favorite color or theme into the project.
Remember, sewing is all about experimentation and having fun. Encourage your child to express themselves and try out different ideas. Who knows what amazing creations they’ll come up with!
More Challenging Projects for Older Children
As your child grows and becomes more confident in their sewing skills, it’s time to move on to some exciting projects that will challenge them and bring a sense of accomplishment. From bags to garments, these ideas are perfect for tweens and teens.
Stuffed Animal Project with Interfacing
As you progress through more challenging sewing projects with older children, it’s time to introduce them to working with interfacing. A great project for this skill-building exercise is a stuffed animal, where the addition of interfacing gives the toy a professional-looking finish and makes it more durable.
Start by choosing a pattern suitable for your child’s skill level, such as a simple bear or cat design. Next, help them cut out two main body pieces from the outer fabric, along with corresponding pieces from a coordinating interfacing material. This can be done using scissors or a rotary cutter, depending on your child’s preference.
When sewing together the body and limbs, emphasize the importance of ironing the interfacing before stitching to prevent wrinkles and ensure smooth seams. You can use a simple running stitch or try more decorative stitches like straight or zigzag stiches for added visual interest.
Zipper Pouch Project with Curved Seams
When introducing older children to more challenging sewing projects, it’s essential to start with a project that builds their skills and confidence. A zipper pouch project with curved seams is an excellent choice for kids who have some experience with basic sewing techniques.
To begin, show the child how to cut out two main fabric pieces, one for the front of the pouch and another for the back. Demonstrate how to curve the seam allowance on both pieces, creating a smooth, rounded edge. Next, sew the two pieces together using a 1/4-inch seam allowance, leaving a small gap at the top for turning.
Once the pouch is turned right side out, press the seams flat and topstitch along the edges. Now it’s time to add the zipper. Show the child how to position the zipper at the top of the pouch, aligning the teeth with the edge of the fabric. Sew the zipper in place using a zipper foot or a regular sewing machine foot. Finally, close the zipper and admire the finished product – a sturdy, functional zipper pouch with curved seams that’s perfect for storing small items like pens, pencils, or makeup.
Tips for Teaching Children to Sew
Getting kids started with sewing can be a fun and rewarding experience, but it requires patience and guidance. This is where our tips come in – they’ll help you get your little ones sewing in no time.
Creating a Conducive Learning Environment
Creating a safe and supportive learning environment is crucial when teaching children to sew. First, designate a dedicated sewing space that’s free from distractions and clutter. Ensure the area has good lighting, adequate workspace, and easy access to necessary supplies. You can repurpose a corner of your home or set up a small sewing station in a well-ventilated room.
Next, choose projects that cater to their skill level and interests. For beginners, start with simple tasks like hand-stitching, drawing straight lines, or basic machine operations. As they gain confidence, introduce more complex techniques, such as working with different fabrics or creating garments.
Encourage your child to ask questions and explore new techniques by providing a supportive atmosphere. Be approachable, patient, and willing to explain concepts in a way that’s easy for them to understand. Emphasize the importance of making mistakes – they’re an essential part of the learning process. Make it fun and engaging by incorporating games, challenges, or competitions to foster creativity and problem-solving skills.
As your child becomes more comfortable with sewing, provide opportunities for experimentation and exploration. Offer a variety of materials, patterns, and techniques for them to try. This will help build their confidence, independence, and enthusiasm for the craft.
Encouraging Independence and Creativity
When teaching children to sew, it’s essential to strike a balance between providing guidance and allowing them to make mistakes. Encouraging independence and creativity can be a delicate process, but with the right approach, your child will become a confident and skilled sewer.
One way to promote independence is by giving your child ownership of their project from start to finish. Let them choose the fabric, pattern, or design they want to work on, and involve them in the decision-making process as much as possible. This will help them feel invested in the outcome and more likely to take pride in their work.
It’s also crucial to allow your child to make mistakes. Yes, you read that right! Mistakes can be valuable learning opportunities for children. Instead of correcting every mistake immediately, let them try to fix it on their own or learn from it. This will help build problem-solving skills and a growth mindset.
Remember, the goal is not to create perfect stitches but to foster creativity and independence in your child. By providing gentle guidance and allowing room for experimentation, you’ll be helping your child develop essential life skills that go far beyond sewing.
Troubleshooting Common Sewing Issues for Kids
As you and your little ones work on their sewing projects, mistakes can happen! This section will help you tackle common issues and get back to creating together in no time.
Dealing with Fabric Glitches or Tears
When it comes to sewing with kids, fabric-related problems can be frustrating and demotivating. But don’t worry, most issues are easy to fix with a few simple techniques! If you notice wrinkles on the fabric, try ironing them out while the fabric is still fresh from the package. This should help relax the fibers and remove any creases.
Snags or runs can be more challenging to repair, but they’re not impossible to fix. For small snags, try using a needle and thread to carefully weave in the direction of the snag. If it’s too big, you might need to use a patching fabric glue to reinforce the area. But if your child has torn through an entire seam, don’t panic! Simply cut out the damaged section and re-sew the fabric together.
To prevent these issues from happening in the first place, encourage your child to handle fabrics gently, avoid pulling threads or yanking on seams, and to keep their workspace clean and organized. By teaching them how to troubleshoot common sewing problems, you’ll not only save time but also help build their confidence and creativity as young sewists!
Fixing Mistakes or Incorrect Measurements
Fixing mistakes is an inevitable part of the learning process, and sewing projects are no exception. When errors occur due to incorrect measurements, don’t panic! Here’s a step-by-step guide on how to correct common mistakes and avoid them in future projects.
First, identify the issue: Take a close look at your project and pinpoint where things went wrong. Measure twice, cut once – this age-old adage is crucial when it comes to sewing for kids. Incorrect measurements can lead to garments that are too big or too small, so make sure you’re using accurate patterns and measuring techniques.
To correct mistakes, start by examining the fabric. If the error occurred during cutting, assess whether the fabric can still be used for the project. If not, consider repurposing it for a different craft or donating it to a local charity.
For errors that occurred during sewing, carefully unpick the stitches without damaging the surrounding fabric. Begin with small areas and work your way up to avoid making things worse. This may take patience and time, but it’s essential to salvage as much of your original work as possible.
Conclusion and Resources for Further Learning
As you’ve completed your sewing projects with children, take a moment to reflect on the joy and accomplishment they’ll have experienced. Not only will they have created something with their own hands, but they’ll also have developed essential skills like patience, problem-solving, and fine motor control.
To continue encouraging their creativity and growth, be sure to provide opportunities for them to design and make projects independently. This can involve introducing more complex techniques or offering a range of fabric choices to suit their individual tastes. Additionally, consider enrolling your child in sewing classes or workshops where they can meet other young sewers and learn from experienced instructors.
For further inspiration and guidance, check out online resources like Craftsy, Sew Mama Sew, or YouTube channels dedicated to kid-friendly sewing projects. These platforms offer a wealth of tutorials, patterns, and tips to help you navigate various stages of your child’s sewing journey.
Frequently Asked Questions
What if my child struggles to follow patterns or instructions?
Don’t worry, it’s a common challenge! Start by breaking down the project into smaller steps, and gradually increase the complexity as your child becomes more confident. You can also try using visual aids like diagrams or videos to help them understand the process better.
How do I choose between cotton and polyester fabric for kids’ projects?
Both fabrics have their advantages. Cotton is soft and breathable, making it perfect for garments that will be worn against the skin. Polyester, on the other hand, is often used for projects that require durability and ease of cleaning, like bags or accessories.
Can I use a sewing machine with my child, or should we stick to hand-sewing?
Both methods have their place! For beginners, hand-sewing can be a great way to develop fine motor skills and patience. However, using a sewing machine can significantly speed up the process and make it more enjoyable for your child. Just remember to supervise them closely when operating any machinery.
How do I encourage my child to take ownership of their projects and make mistakes?
Mistakes are an essential part of the learning process! Encourage your child to experiment and try new things, even if they might go wrong. When mistakes happen, use them as opportunities to teach problem-solving skills and encourage your child to think creatively.
What’s the best way to store and organize sewing supplies for kids?
Keeping supplies organized will make it easier for your child to find what they need when working on a project. Consider using storage bins or baskets labeled by category (e.g., fabrics, threads, notions). This will help prevent clutter and keep the workspace tidy.