
Summer is here, and you know what that means – endless hours of fun in the sun with your little ones! But as much as we all love the warm weather, it’s also a great time to encourage our kids’ creativity and imagination. Arts and crafts are an excellent way to foster their motor skills, emotional development, and most importantly, their sense of self-expression. In this article, we’ll explore some engaging summer arts and crafts ideas that you can easily try at home with your kids. From colorful painting projects to DIY crafts that bring out the inner artist, we’ve got a treasure trove of fun activities to keep your little ones entertained and creatively stimulated all season long.
Introduction to Summer Arts and Crafts
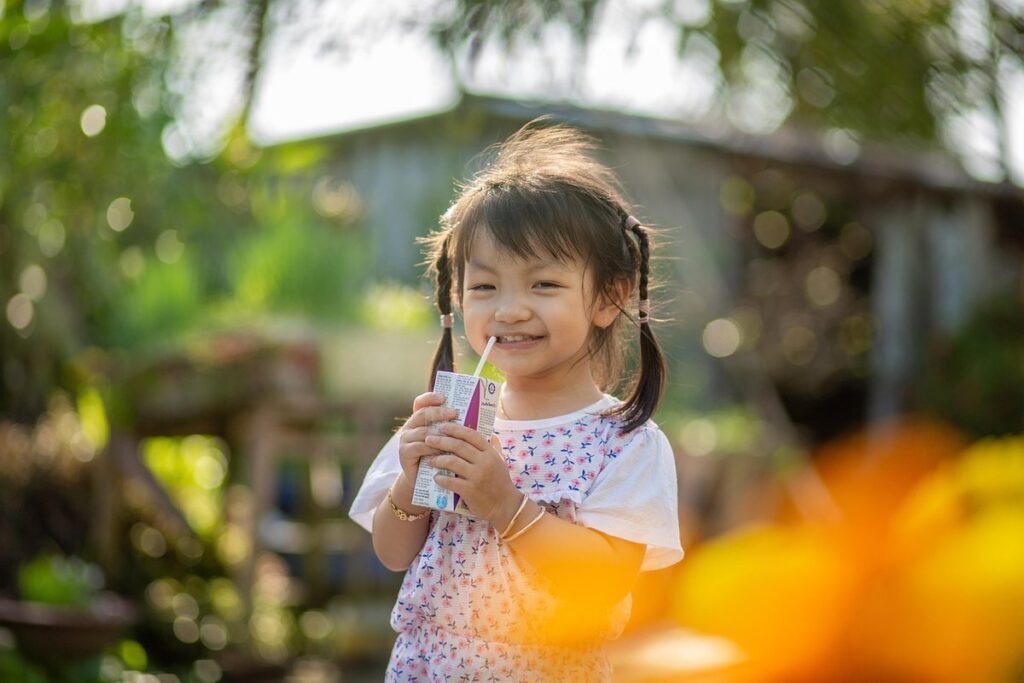
Welcome to our summer arts and crafts series, where we’ll explore fun projects for kids that are perfect for warm weather. Let’s get creative together!
Importance of Arts and Crafts in Child Development
Arts and crafts play a vital role in child development, extending far beyond mere creativity. Engaging in various art forms helps children develop essential skills that benefit them throughout their lives. From cognitive abilities to motor skills, arts and crafts contribute significantly.
Cognitively, arts and crafts stimulate imagination, problem-solving, and critical thinking. For instance, when working on a painting project, children must plan color combinations, anticipate textures, and balance composition – all of which demand mental processing and creativity. As they experiment with different materials and techniques, their cognitive skills become sharper.
Motor skills are also improved through arts and crafts activities. Drawing, painting, or sculpting require manual dexterity, hand-eye coordination, and fine motor control. Regular engagement in these activities enhances children’s ability to manipulate objects and develop better hand-eye coordination. Furthermore, arts and crafts help children express emotions effectively, reducing stress and anxiety levels while fostering self-confidence.
Engage your child in various art forms this summer to witness their development thrive. Encourage them to explore different materials like clay, paper, or fabric, and provide guidance as needed.
Benefits of Engaging in Summer Arts and Crafts
Engaging in summer arts and crafts is an incredibly valuable activity for kids, offering a wide range of benefits that can have a lasting impact on their development. One of the most significant advantages is the reduction of screen time. In today’s digital age, it’s easy for children to spend hours glued to screens, whether it’s TV, tablets, or smartphones. By incorporating arts and crafts into their daily routine, you’re giving them a healthy alternative that promotes creativity, imagination, and physical activity.
Arts and crafts also provide an excellent outlet for self-expression, allowing kids to tap into their creative potential and bring their ideas to life. This can help build confidence, encourage experimentation, and foster a sense of pride in their work. Additionally, summer arts and crafts can be a great way to teach valuable skills like fine motor control, hand-eye coordination, and problem-solving – all while having fun! By making time for arts and crafts this summer, you’ll give your child the perfect opportunity to unwind, explore their creativity, and develop essential skills that will benefit them well into adulthood.
Section 1: Outdoor Art Projects
Get your little ones outdoors and creative with these fun outdoor art projects, from sidewalk chalk masterpieces to garden sculptures. We’ll show you how to bring art into nature!
Nature-Inspired Collages
Get creative and connect with nature by making collages using natural materials like leaves, flowers, and branches. This fun and easy project is perfect for kids to explore their artistic side while appreciating the beauty of the outdoors.
To start, collect various types of leaves, petals, and small twigs from your backyard or a nearby park. You can use flowers in bloom, such as daisies or sunflowers, for vibrant colors. Gently press the leaves between sheets of paper to flatten them and prevent tearing.
Next, choose a surface for your collage, like cardboard or watercolor paper. Use a mixture of glue – like white school glue or even honey – to stick the natural materials onto your chosen base. Experiment with different textures by layering various elements, such as placing delicate petals on top of sturdy leaves.
To add more dimension, you can use small branches or twigs to create a border around your collage. Let the kids’ imagination run wild and arrange the natural materials in unique patterns, creating an abstract design or even a recognizable image.
Sidewalk Chalk Murals
Creating a colorful sidewalk chalk mural is an excellent way to encourage kids to express their creativity and imagination. Start by choosing a large, flat area on the sidewalk or driveway where the chalk won’t get washed away easily. Use washable sidewalk chalk that comes in a variety of colors and vibrant hues.
Begin by sketching out a rough outline of your design with a soft pencil or a piece of chalk. You can draw inspiration from nature, architecture, or even cartoons to create unique and engaging designs. Once you have a clear idea, start filling in the larger areas with broad strokes using washable chalk. Encourage kids to experiment with different colors, textures, and patterns.
Remember to work on a large scale for best results. Divide the mural into sections to avoid overwhelming yourself or the kids. Use stencils or stickers if needed to help create intricate details. With patience and practice, even young children can create stunning works of art that will add a splash of color to your neighborhood streets.
Garden Stone Painting
Painting garden stones is an easy and fun outdoor art project that kids can enjoy while adding a decorative touch to their backyard. You’ll need some basic supplies like plain garden stones, acrylic paints, paintbrushes, sealant, and a surface to work on.
Start by gathering the stones and letting your child choose which ones they want to paint. Clean the stones with soap and water before painting for better results. Now it’s time to get creative! Let your child decide what design or message they want to paint. You can also provide some inspiration, like pictures of garden designs or quotes about nature.
Use acrylic paints that are specifically designed for outdoor use, as they’ll be able to withstand the elements. A good rule of thumb is to let the kids do most of the painting while you supervise and guide them. Once the painting is complete, apply a clear sealant to protect it from the sun and rain.
Tips: Encourage your child to experiment with different colors and designs. You can also make this project more challenging by adding patterns or layers to the design.
Section 2: Water-Based Art Activities
Get ready for a splash of creativity as we dive into some fantastic water-based art activities perfect for hot summer days and curious little minds. From painting to playdough, these ideas are easy and fun!
Watercolor Painting with Kids
Introducing watercolor painting to kids can be a delightful and creative experience for both children and adults alike. To get started, gather a few basic materials such as watercolor paints, brushes, paper, and a palette. Encourage the child to experiment with different brushstrokes and techniques like wet-on-wet, drybrushing, or scrubbing.
To create unique effects, try layering washes of transparent paint to achieve soft blended colors. For example, start by applying a light blue wash to the entire paper, then allow it to dry before adding additional layers of pink, yellow, or green. This technique will help kids understand how colors interact with each other and produce unexpected results.
Another tip is to use salt as a texturing agent – sprinkle some on wet paint for interesting patterns. You can also experiment with household items like sponges, leaves, or even credit cards to create unique textures. By exploring these techniques, kids will develop their fine motor skills while having fun creating beautiful watercolor art pieces.
Bubble Painting
Get ready to blow minds with a unique and engaging art activity that’s perfect for warm summer days: bubble painting! This fascinating technique uses soap bubbles as a paint medium, creating mesmerizing patterns on paper or fabric. To get started, you’ll need some simple materials like dish soap, water, a bubble wand or machine, and your chosen surface (paper or fabric work beautifully).
The process is quite magical: blow bubbles onto the surface, and watch as they pop and leave behind intricate patterns. The movement of the bubbles creates a dynamic effect, with each one bursting in its own unique way. This makes every piece of art created through bubble painting truly one-of-a-kind.
To enhance your experience, try experimenting with different soap-to-water ratios to achieve varying bubble sizes and shapes. You can also use a straw to blow smaller, more precise bubbles or a blower to create bigger ones for a more dramatic effect. For an added twist, dip the surface in water before painting to make the bubbles stick around longer.
The results are simply stunning – think of it as a combination of science and art! With bubble painting, kids will have hours of fun creating their own abstract masterpieces while learning about buoyancy and density. So grab some soap and let the creative bubbles begin!
Sea Salt Resist Art
Create unique and textured art designs with sea salt resist technique! This fun and easy activity is perfect for kids to experiment with water-based art. To get started, you’ll need some paper or canvas, a cup of warm water, a brush, and a pinch of sea salt.
Dip your brush in the warm water and apply it to the paper or canvas in the desired design. Then, sprinkle a small amount of sea salt over the wet area. The salt will resist the paint, creating interesting patterns and textures. You can experiment with different designs, such as swirling shapes or geometric patterns.
As the paint dries, the salt will lift off, revealing your unique design underneath. Be sure to use a gentle touch when applying the paint to avoid pushing the salt crystals into the paper. You can also try layering multiple colors of paint and salt for even more dramatic effects. With sea salt resist art, the possibilities are endless!
For an added twist, try using different types of paper or fabric, such as watercolor paper or cotton canvas, to create unique textures and patterns. Encourage kids to experiment with different shapes, colors, and designs to make their art truly one-of-a-kind.
Section 3: Recycled Materials Crafts
Get creative while being eco-friendly by making unique crafts using recycled materials, from old CDs to cardboard tubes and plastic bottles, found around your home. We’ll show you how!
Cardboard Box Creations
Get creative with cardboard boxes and turn them into amazing art pieces! Kids love working with recycled materials, and cardboard boxes are the perfect canvas for their imagination. Did you know that a simple cereal box can become a mask, a puppet, or even a 3D sculpture?
To start, gather different sizes and shapes of cardboard boxes, scissors, glue, paint, markers, and any other embellishments your child might like to use. Show them how to cut out shapes and patterns from the boxes to create unique designs. For example, they can make a dragon’s scales by cutting out small squares from the box and gluing them onto a larger sheet.
Encourage your child to think beyond just cutting and pasting. They can fold, bend, or even tape two boxes together to create a 3D shape. With some imagination, those cardboard boxes can become an animal puppet, a cityscape, or even a fantasy creature. As they work on their creations, ask them about the story behind each piece – what inspired it? What materials did they choose and why? This will help develop their creative thinking skills while having fun making art.
As you work together with your child, remember to let go of perfectionism and encourage experimentation. After all, it’s not about creating a masterpiece but rather enjoying the process and learning from mistakes. Who knows what amazing creations they’ll come up with next?
Paper Plate Crafts
Paper plates are an incredibly versatile craft material that can be transformed into a wide range of creative projects. One of the most popular paper plate crafts is making hats! Simply cut out a headband shape from the plate, decorate it with paint, markers or stickers, and add some elastic or ribbon to secure it to your child’s head.
Another fun project is creating flowers using paper plates. Cut out petal shapes from multiple plates, arrange them in a bouquet-like formation, and glue them together to create a beautiful flower. You can also add some green construction paper leaves to complete the look. For an extra touch, use a hot glue gun (with adult supervision) to attach some glitter or beads to the center of each petal.
You can also get creative with jewelry-making using paper plates! Cut out shapes or designs from the plate and glue them onto a piece of string or twine to create unique earrings or pendants. The possibilities are endless, and kids will love experimenting with different colors and patterns to create their own one-of-a-kind accessories.
Bottle Cap Mosaic
Get creative and craft a beautiful mosaic artwork using recycled bottle caps! This fun project is perfect for kids to express their artistic side while promoting sustainability. To create a stunning bottle cap mosaic, you’ll need a variety of colored bottle caps, a design or pattern in mind, and some basic art supplies.
Start by sorting the bottle caps by color to get an idea of what colors you have available. Then, sketch out your design on paper or use a graph paper to help you visualize the layout. Once you’re happy with your design, it’s time to start arranging the bottle caps. Begin with the largest pieces and work your way down to the smaller ones.
Tips: Use hot glue to attach the bottle caps to a piece of cardboard or wood, making sure to leave some space between each cap for a seamless look. You can also use a mosaic adhesive or grout to add an extra layer of protection and durability. With patience and creativity, you’ll have a beautiful and unique artwork that’s perfect for decorating your room or gifting to friends and family.
Section 4: DIY Craft Kits and Supplies
Looking for fun and creative ways to keep your kids engaged this summer? We’ll share our favorite DIY craft kits and supplies that are perfect for making memories in the sun!
Homemade Playdough
Making homemade playdough is a fun and easy activity that can be customized to suit your child’s preferences. With just a few simple ingredients, you can create a variety of textures, colors, and scents that will keep kids engaged for hours.
To make a basic recipe, you’ll need 2 cups of flour, 1/2 cup of warm water, 1/4 cup of salt, 2 tablespoons of vegetable oil, and 2 tablespoons of cream of tartar. Mix the dry ingredients together in a bowl, then gradually add in the wet ingredients until a dough forms. You can also add a few drops of food coloring or essential oil to create different hues and scents.
For an extra touch, try adding some texture with materials like glitter, sand, or even shredded paper. This is a great way to encourage kids to experiment and get creative. Some ideas for customizing your playdough include making a “cloud” scent by mixing in vanilla extract or creating a rainbow effect with multiple colors. With these simple ingredients and endless possibilities, homemade playdough is the perfect DIY project for summer arts and crafts.
Handmade Markers and Paints
Create unique and fun markers and paints using household ingredients that are safe for kids. One of the easiest ways to make natural markers is by using food coloring, water, and glue. Mix a few drops of food coloring with 2 tablespoons of water to create the color you want. Then, add a teaspoon of white glue to the mixture and stir well.
To use this homemade marker, simply dip a piece of paper or cardstock into the mixture and draw away! The paint can be customized by adjusting the amount of food coloring used, making it perfect for little artists who love experimenting with colors. For example, adding more food coloring will create a brighter color, while using less will result in a softer hue.
Making natural paints is also a breeze. Combine 2 tablespoons of water with 1 tablespoon of cornstarch and 1 teaspoon of vegetable oil to create a thick paint consistency. You can then add a few drops of food coloring to the mixture for different colors. This homemade paint is great for painting on paper, fabric, or even rocks.
Recycled Materials Supplies
Using recycled materials in arts and crafts projects is not only fun for kids but also teaches them valuable lessons about reducing waste and promoting sustainability. By incorporating recycled materials into their creations, children can help minimize the amount of trash sent to landfills and conserve natural resources.
One of the best ways to start using recycled materials is by collecting items from around the house or neighborhood that would otherwise be thrown away. Old cardboard tubes, plastic bottles, egg cartons, and newspaper are just a few examples of items that can be transformed into unique art pieces. For instance, you can use empty toilet paper rolls to create bird feeders or marble runs.
When working with recycled materials, it’s essential to encourage kids to think creatively about how they can repurpose these items. This might involve cutting, shaping, and assembling the materials in innovative ways. By doing so, children develop problem-solving skills, fine motor dexterity, and self-expression.
Some other fun projects include making collages using old magazines or creating sculptures from recycled plastic containers. You can also try upcycling old clothing into new accessories or jewelry.
Section 5: Tips for Parents and Caregivers
As a parent or caregiver, you’re likely looking for ways to keep your child engaged and creative throughout the summer. This section offers practical tips on how to make arts and crafts fun and stress-free for everyone involved.
Encouraging Creativity
Encouraging creativity is essential for kids to explore their imagination and develop their problem-solving skills. As a parent or caregiver, you can create an environment that fosters creativity by providing open-ended art supplies. Instead of giving them pre-cut shapes or specific colors, offer materials like paper, fabric, paint, markers, or clay. This allows them to think freely and bring their ideas to life.
Embracing their unique style is also crucial in encouraging creativity. Avoid critiquing or correcting their work, as this can stifle their imagination. Instead, praise their efforts and acknowledge the process of creating something new. Encourage experimentation by saying things like, “What if you tried combining different colors?” or “Let’s see what happens when we mix these textures.”
You can also try setting aside dedicated time for creative play each day, without any expectations or goals in mind. This allows your child to explore and express themselves freely, making mistakes and learning from them along the way.
Managing Messy Art Projects
When embarking on messy art projects with your kids, it’s essential to have a plan in place for minimizing chaos and maximizing creativity. One of the simplest ways to do this is by covering work surfaces with newspaper, a plastic tablecloth, or even an old vinyl table runner. This will protect your furniture from paint stains, glue spills, and other art supplies that might accidentally make their way off the surface.
Protective gear is also crucial for preventing messes before they happen. Make sure to wear old clothes or aprons, as well as gloves if necessary (for messy materials like paint or clay). This will save you from scrubbing away at stubborn stains later on. You can also set up a designated art area with easy-to-clean surfaces, such as a large piece of cardboard or a washable tablecloth.
When spills do occur, stay calm and have supplies on hand to clean them up quickly. Keep rags, soap, and water nearby to tackle any messes before they spread. Remember, the goal is to have fun while making art – so be prepared for accidents, but also enjoy the process of creating something beautiful together with your child!
Displaying and Preserving Artwork
Displaying and preserving children’s artwork is not just about filling up a fridge with colorful creations – it’s an opportunity to showcase their growth, creativity, and pride. A well-curated gallery or scrapbook can become a cherished family heirloom, but it requires some thought and effort.
To start, designate a specific area in your home as the “art gallery” where kids can display their favorite pieces. You can use command strips, 3M picture hanging strips, or even create a DIY frame with reclaimed wood. Rotate the artwork regularly to keep things fresh and exciting for everyone. Don’t forget to include a caption or title for each piece, highlighting the child’s name, date, and medium used.
Consider creating a scrapbook or journal where kids can store their artwork, along with notes and memories from each project. This way, they’ll have a keepsake that celebrates their creative journey over time. You can also involve your child in the process of designing the layout, choosing colors, and adding photos – it’s a great way to spend quality time together.
When storing artwork, use acid-free paper or matboard to prevent damage and fading. Avoid laminating pieces, as this can create a protective barrier that prevents the artwork from being appreciated in its original form. By displaying and preserving their artwork, you’ll be fostering a love for art, creativity, and self-expression that will last a lifetime.
Conclusion
As we conclude our exploration of summer arts and crafts for kids, remember that these activities aren’t just fun – they’re also valuable learning experiences. By engaging your child in creative pursuits, you’re helping them develop essential skills like problem-solving, critical thinking, and fine motor control. Make the most of this time by incorporating a mix of structured projects and open-ended creativity. For example, start with a simple painting session or DIY craft, then gradually introduce more complex techniques and materials as your child becomes more confident.
Encourage experimentation and imagination by providing access to various supplies and letting your child take the lead in their creative process. Be prepared for unexpected outcomes – they can often be just as valuable as planned successes!
Frequently Asked Questions
What are the best ways to encourage kids to participate actively in summer arts and crafts projects?
Encourage your child’s participation by letting them choose their own project or style, providing a variety of materials and supplies, and engaging with them throughout the process. This will help build their confidence and creativity. Be sure to offer guidance and support when needed, but also allow for independence and self-expression.
Can I use eco-friendly materials in summer arts and crafts projects?
Yes! Using recycled or natural materials is a great way to teach kids about sustainability and environmental responsibility. Consider using old cardboard tubes, fabric scraps, or natural dyes instead of traditional art supplies. This will not only reduce waste but also inspire your child’s creativity.
How can I display and preserve my child’s artwork without cluttering our home?
Consider displaying artwork in a dedicated space, such as a corkboard or a framed wall display. You can also create a rotating display where you showcase new artwork each week while storing older pieces safely. Additionally, consider scanning or photographing their artwork to create digital copies that won’t take up physical space.
What are some tips for managing messy art projects?
Prepare your workspace by covering it with newspaper or a plastic tablecloth. Encourage kids to wash their hands before and after the project, and have wipes or soap handy for cleaning spills. Consider using washable paints or markers to minimize cleanup. Lastly, be patient and enjoy the process – some mess is inevitable!
Can I adapt summer arts and crafts projects for children with special needs?
Yes! Many art projects can be adapted to accommodate different abilities and needs. Consider using larger brushes or sponges for children with fine motor difficulties, providing extra support for those with visual impairments, or offering sensory-friendly alternatives like playdough or slime for children with sensory processing issues.