
Hey there, young adventurers! Are you curious about how pumpkins grow? Do you wonder how they go from tiny seeds to the big, orange gourds we see in the fall? Well, you’re in luck because today we’re going to take a fun journey through the amazing life cycle of a pumpkin!
From seed germination to harvest time, we’ll explore every step of the way. You’ll learn how pumpkins develop and grow, and even discover some cool ways they’re preserved. We’ll break it down into easy-to-follow steps so you can understand the process like a pro! By the end of this article, you’ll be an expert on all things pumpkin and ready to impress your friends with your knowledge. So let’s get started and see how pumpkins go from tiny seeds to a juicy, delicious treat!
How Pumpkins Grow from Seeds
Let’s see how pumpkins start their life journey from tiny seeds! In this next part, we’ll explore the amazing process of how pumpkins grow from those small beginnings.
Understanding the Basics of Planting Seeds
When you’re ready to plant pumpkin seeds, make sure you have a few basic things: soil, water, and sunlight. You can start by mixing some special seed starting mix with some water to create a smooth paste. Then, place one or two seeds about an inch deep into the mix, making sure they’re not touching each other.
Next, put the mix in a warm spot, like a sunny windowsill or under grow lights. The ideal temperature for germination is around 70-80°F (21-27°C). Keep the soil moist but not too wet – just like how you like your pillow to be, neither too dry nor too soggy! It usually takes about three to seven days for the seeds to sprout.
Once the seedlings have two sets of leaves, it’s time to transfer them into bigger pots. Make sure they’re getting enough sunlight and watered regularly. You can also add some fertilizer once a week to give them an extra boost. Keep in mind that pumpkin plants need lots of space to spread out, so be prepared for them to take over your garden!
Seed Germination: The First Step to Growth
So, you want to know the secret of how pumpkins grow? It all starts with tiny seeds! When a pumpkin seed absorbs water, it’s like waking up from a long sleep. The seed begins to swell and soften, and that’s when the magic happens. This process is called germination.
Inside the seed, there are two small parts: the root (or radicle) and the sprout (or hypocotyl). When the seed absorbs water, these tiny roots start growing downward into the soil, searching for nutrients. At the same time, the sprout begins to grow upward, towards the sunlight. It’s like a little green stem that will eventually become the vines of your pumpkin plant!
As the roots and sprout continue to grow, they’ll start to break through the surface of the soil, and you’ll see the first two leaves of your pumpkin plant emerging. This is called the cotyledon stage. These two little leaves are like tiny umbrellas that help protect the delicate seedling from harsh sunlight.
Now, it’s essential to keep the soil moist but not waterlogged, so the roots can grow strong and healthy. With proper care, you should start seeing your pumpkin seeds sprouting within 7-10 days. Remember, this is just the beginning of your pumpkin plant’s journey to becoming a delicious and bountiful harvest!
Transplanting Seedlings into Larger Containers
As your pumpkin seedlings grow, they’ll need more room to stretch their roots and branches. This is where transplanting them into larger containers comes in! Think of it like moving from a small apartment to a bigger house – you need more space to spread out and feel comfortable.
When seedlings are too crowded in small pots, they can become leggy and weak. Their roots start to circle around the container, making it hard for them to absorb enough water and nutrients. By transplanting them into larger containers, you give their roots room to grow downwards and outwards, just like a strong foundation supports a big house.
To transplant your seedlings successfully, make sure to choose pots that are only slightly bigger than their current ones. This will help prevent the soil from getting too wet or dry. Gently remove the seedling from its old pot, taking care not to damage those delicate roots. Plant it in the new container, making sure the soil level is the same as before. Water well and keep the soil consistently moist – your pumpkin plant should start to thrive in no time!
The Magic of Photosynthesis
Did you know that plants are superheroes of nature? In this special section, we’ll discover how they make their own food using sunlight!
How Pumpkins Use Sunlight to Grow
You know how you need food to give you energy to play and have fun? Well, plants are kind of like that too! But instead of eating food, they make their own energy from sunlight. This magic trick is called photosynthesis.
So, what does it mean to make energy from sunlight? It’s actually pretty simple. Plants take in three main things: water from the ground, carbon dioxide from the air, and sunlight. They mix these ingredients together and create a yummy, sweet treat called glucose (say “gloo-kose”). This glucose is like a special kind of food that gives plants energy to grow big and strong.
As a pumpkin grows, it uses photosynthesis to make more and more energy. It stretches its vines out towards the sun, drinking in the sunlight and using it to fuel its growth. This is why pumpkins get so big and ripe – they’re basically eating sunshine!
The Importance of Water for Plant Growth
Water is one of the most essential things for our pumpkin plant to grow big and strong. Without enough water, the plant’s leaves will start to wilt, and it won’t be able to make the food it needs to grow. But how does water help with growth? Well, let’s talk about photosynthesis again!
You see, when plants use sunlight, water, and air to make food through photosynthesis, they also release oxygen into the air as a byproduct. Water helps carry nutrients from the soil up to the leaves where they can be used for growth. It’s like a delivery truck bringing packages of food to all parts of the plant!
When we give our pumpkin plants enough water, they’re able to grow strong and healthy. We should make sure to water them deeply once or twice a week, depending on how hot it is outside. The soil should be moist but not soggy – just like how we like our favorite snacks, not too dry or too wet!
It’s also important to note that plants can’t absorb nutrients from the air directly. They need water to help carry these nutrients up to where they’re needed. So, remember: give your pumpkin plant plenty of water and it will be on its way to becoming a giant gourd!
Pollination: How Bees Help Pumpkins Grow
When you take a walk through a pumpkin patch on a sunny day, you might notice buzzing around the flowers. These tiny creatures are very important for helping pumpkins grow! Their job is called pollination.
Pollination is like matchmaking between plants and pollen. The male part of the flower, called the anther, produces yellow dust-like pollen. This pollen needs to meet the female part of the flower, called the stigma, so they can create seeds inside the pumpkin. Without this matching process, pumpkins wouldn’t grow at all.
Bees are some of the best helpers in this job! They collect nectar from flowers and in the process, pick up the pollen on their furry bodies. When a bee visits another flower, some of that pollen is transferred to the new flower, allowing pollination to happen. This is why you often see bees hovering around pumpkin blossoms. Other helpful pollinators include butterflies, moths, and even hummingbirds!
To help pumpkins grow, make sure to plant flowers like sunflowers or zinnias nearby, which attract these busy bee friends. By creating a welcoming environment for pollinators, you’ll be giving your pumpkins the best chance to thrive!
Life on the Vine
Let’s follow the pumpkin plant as it grows and produces delicious pumpkins, and learn all about its life cycle from seed to harvest. We’ll explore what happens next in the vine!
The Different Stages of Pumpkin Development
You know how plants grow and change over time? Well, pumpkins are no exception! Let’s take a look at the different stages of pumpkin development. It all starts with flower formation.
When you plant pumpkin seeds, tiny white flowers will start to bloom on the vine. These flowers are actually male or female reproductive parts of the plant. The male flowers produce pollen, while the female flowers contain a tiny ovary that can grow into a pumpkin.
If a male flower pollinates a female flower, the ovary will begin to swell and grow, eventually turning into a small, round fruit called a baby pumpkin. This is called fruit set. As the baby pumpkin grows, it will start to develop ridges and bumps on its surface.
After about 100 days of growth, the baby pumpkin will turn yellow and soften, signaling that it’s ripe for harvest. But don’t worry if you’re not sure when your pumpkin is ready – simply check for a hard rind and a deep orange color. Then, carefully cut the stem with a knife to bring home your very own delicious pumpkin!
The Role of Vines in Pumpkin Growth
Pumpkin vines are like superheroes for pumpkin plants. They help spread out the plant’s energy to make sure it can produce lots of flowers and fruits. This is called ” Photosynthesis”. The vine gets water and nutrients from the roots, and then shares them with the rest of the plant.
But that’s not all – the vine also helps distribute these resources evenly throughout the plant. It’s like a highway system for the pumpkin plant, making sure everything gets what it needs to grow strong and healthy. This way, more flowers can bloom on different parts of the plant, increasing the chances of getting lots of pumpkins.
To see this in action, look at how the vine wraps itself around nearby objects or even other plants! It’s like a blanket keeping everything cozy and connected. As you observe your pumpkin plant growing, remember that the vines are hard at work behind the scenes to help it thrive and produce an abundance of delicious pumpkins.
Pests and Diseases: Common Threats to Pumpkin Plants
Pumpkins are delicious and fun to grow, but they can also be susceptible to some common pests and diseases that might harm them. As a young gardener, it’s essential to know what these threats are so you can take steps to protect your pumpkin plants.
One of the most common pests that target pumpkins is aphids – tiny, soft-bodied insects that feed on plant sap, causing curled or distorted leaves. To get rid of aphids, simply spray your plants with water, then use a mild soap solution (1 tablespoon of dish soap in 1 quart of water) to help kill them off.
Diseases like powdery mildew and fungal infections can also affect pumpkin plants. These usually start as small white patches or spots on the leaves before spreading. To prevent this, make sure your plants have good air circulation by giving them enough space between each other. If you notice any signs of disease, remove infected areas and treat your plants with a fungicide.
Some insects like squash bugs can also harm pumpkin plants by sucking their sap and leaving behind eggs that hatch into more bugs. To prevent this, keep an eye out for these pests and remove any weeds or debris from around your garden where they might hide. By keeping your garden clean and monitoring for potential threats, you’ll be well on your way to growing healthy and thriving pumpkin plants!
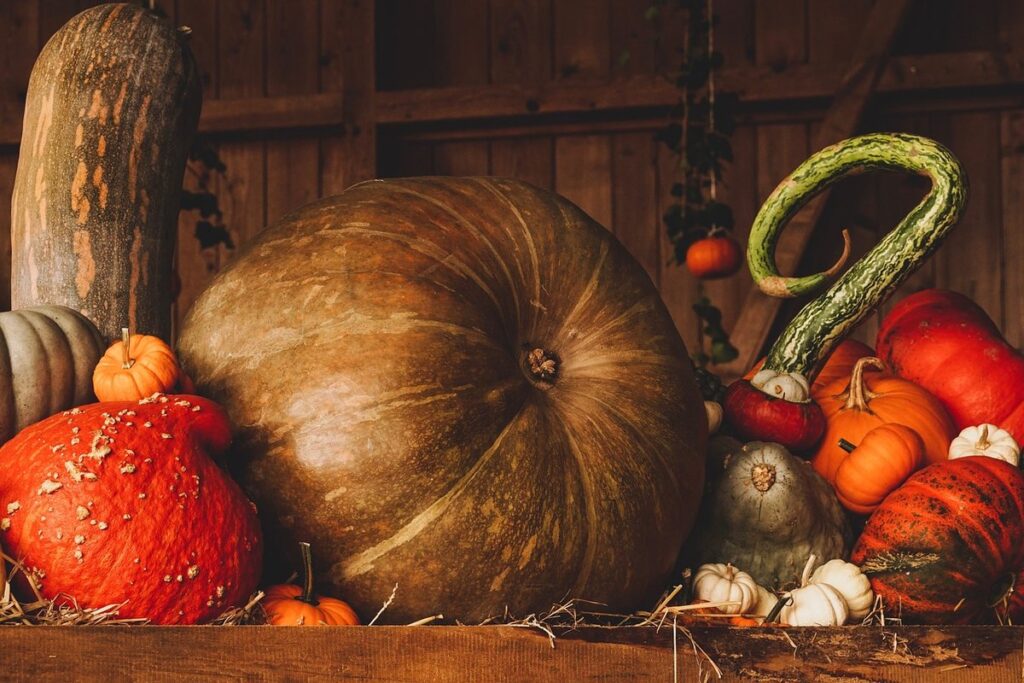
Harvest Time!
Now that our pumpkin has grown big and strong, it’s time for one of the most exciting parts: harvesting your very own pumpkin! We’ll show you how to pick the perfect one.
When Are Pumpkins Ready to Be Picked?
Now that our pumpkin plants have grown big and strong, it’s time to check if they’re ready to be picked! But when exactly is a pumpkin ripe and ready for harvest? Don’t worry, I’ve got the scoop!
To determine if a pumpkin is ripe, we need to look at a few signs. First, let’s talk about color. A ripe pumpkin will have a deep, rich orange color all over its skin – not just in patches! If it still looks pale or has green spots, give it some more time.
Next, check the stem. When a pumpkin is mature, its stem will dry out and turn brown, becoming brittle to the touch. This might sound weird, but trust me, it’s a sign that the pumpkin is ready!
Another way to check if your pumpkin is ripe is by gently thumping on it with your fingers. A ripe pumpkin will have a deep, hollow sound when you tap it. If it sounds metallic or has no resonance at all, it might not be quite ripe yet.
Remember, pumpkins are like fruit – they’ll continue to ripen off the vine! So even if it’s not perfectly ripe in the garden, you can still bring it home and let it finish its journey on your kitchen counter.
How to Care for Your Grown Pumpkins
Now that you’ve grown your very own pumpkins and it’s time to harvest them, let’s talk about how to take good care of them. You might think that once the pumpkin is picked from the vine, its job is done, but not quite! Harvested pumpkins still need a little TLC to stay fresh and healthy.
First things first, handle your pumpkins with care. Gently pick them up by the stem, rather than grasping them from the sides, as this can cause bruises or even break the skin. If you notice any cracks or soft spots on your pumpkin, it’s best to set it aside as it won’t keep well.
For storing, choose a cool, dry place with good air circulation – like a basement or a garage. Don’t leave pumpkins in direct sunlight, as this can cause them to rot quickly. A temperature between 50-60°F (10-15°C) is ideal for keeping your pumpkin fresh. You can also store them in a mesh bag or a ventilated container to keep air circulating around the fruit.
Remember to check on your stored pumpkins regularly and remove any that show signs of spoilage to prevent the problem from spreading. With proper care, your grown pumpkins will stay healthy and fresh for weeks!
The Fun of Cooking with Homegrown Pumpkins
Now that you’ve harvested and enjoyed eating some of your homegrown pumpkins, it’s time to get creative with the rest! Cooking with fresh pumpkin is an absolute delight, and I’m excited to share some super simple recipes perfect for kids like you.
When working with fresh pumpkin, keep in mind that it’s not as sweet as store-bought canned pumpkin. But don’t worry – a little bit of sugar or honey can help balance out the flavor! Let’s start with a basic recipe: Roasted Pumpkin Soup. All you need is your homegrown pumpkin, some olive oil, salt, and pepper. Simply chop the pumpkin into cubes, toss with oil and seasonings, and roast in the oven until tender. Then blend it all together with some chicken or vegetable broth for a delicious and comforting soup.
Here are some other fun ideas to get you started:
• Make a Pumpkin Pie: Use your homegrown pumpkin puree as the base for this classic dessert.
• Add diced pumpkin to your favorite pasta sauces or curries for an extra boost of flavor and nutrition.
• Try baking pumpkin bread or muffins – they’re perfect for snacking on the go!
Remember, always ask an adult for supervision when using the kitchen and handling hot ingredients. Now get creative and enjoy cooking with your fresh homegrown pumpkins!
Preserving the Harvest
Now that we’ve grown and harvested our pumpkins, let’s think about how to keep them fresh for a long time – from making pies to decorating our homes!
Why Do We Need to Preserve Pumpkins?
Pumpkins are not just a seasonal treat, but they’re also an important part of our food culture. But did you know that pumpkins can be enjoyed throughout the year? By preserving them, we can save some for later and enjoy their delicious flavor even after the harvest season is over.
Imagine being able to make pumpkin pie or soup in January, using a fresh-tasting pumpkin that was harvested months ago. That’s what preserving does! It helps us enjoy our favorite foods all year round, without having to rely on frozen or imported produce. Plus, preserved pumpkins are just as nutritious and delicious as fresh ones.
Preserving also helps reduce food waste. When we harvest too much of a crop, like pumpkins, it can go bad if not used quickly enough. By preserving some, we’re reducing the amount that’s wasted and making the most of what we have. You can preserve pumpkins by cooking them down into puree, dehydrating or freezing them, or even turning them into beautiful decorations to last all year long!
Techniques for Preserving Pumpkins
Do you have a bunch of ripe pumpkins at home and don’t know what to do with them? Well, you’re not alone! Pumpkins are delicious and nutritious, but they can be quite fragile. If we want to enjoy them throughout the year, we need to find ways to preserve them.
One way to preserve pumpkins is by freezing them. Simply cut the pumpkin into cubes or slices, remove any seeds or pulp, and place them in an airtight container or freezer bag. Frozen pumpkin can be used in soups, stews, pies, and even as a side dish! Another method is canning. This involves heating the pumpkin to kill off bacteria and then sealing it in a jar with a vacuum sealer.
Dehydrating pumpkins is also an excellent option. Slice the pumpkin thinly and lay them out on a dehydrator or oven tray (on the lowest heat setting). Once dry, you can store them in airtight containers for up to six months. You can use dried pumpkin in recipes like trail mix, granola, or as a topping for yogurt or oatmeal.
When preserving pumpkins, it’s essential to follow proper food safety guidelines to avoid contamination and spoilage. Always check the pumpkin for any signs of mold or rot before preserving it, and make sure to label and date your preserved pumpkin so you can keep track of how long it’s been stored.
Creating a Pumpkin Patch: Tips for Saving Seeds
Saving seeds from your favorite pumpkin patch is one of the most rewarding parts of growing these amazing gourds. Not only will you be able to grow them again next year, but you’ll also have a steady supply of seeds for friends and family who want to try their hand at growing pumpkins too.
To save seeds, start by choosing a healthy pumpkin from your patch that has the desired characteristics – size, shape, color, and texture. Scoop out the seeds and set them aside in a bowl. Rinse the seeds with water to remove any excess pulp or stringy bits.
Next, let the seeds dry completely either air-drying them on a paper towel or by spreading them out on a baking sheet in a low oven (150-200°F). Once they’re completely dry, you can store them in an envelope or container. When labeling your seed packets, be sure to include the date, variety name, and any notable traits like size or color.
This way, you’ll have a steady supply of seeds for next year’s pumpkin patch. Try growing different varieties each season to see which ones do best in your climate and soil type.
Conclusion
In conclusion, we’ve learned that pumpkins have a fascinating life cycle. From tiny seeds planted in the ground to mature vines covering acres of farmland, it’s amazing to think about how much work goes into growing these delicious and versatile vegetables. Next time you visit a pumpkin patch or farm market, take a closer look at the different stages of growth and see if you can spot any of the signs we discussed earlier – like tiny sprouts emerging from seeds or the distinctive “scoop” shape of a mature pumpkin.
Remember, every small seed has the potential to become a giant pumpkin! So don’t be afraid to plant your own pumpkin seeds at home and observe their growth over time. Who knows what size and shape your very own pumpkin will turn out to be?
Frequently Asked Questions
How often should I water my pumpkin seedlings?
Make sure the soil is consistently moist but not too wet, especially during the first few weeks after germination. Water your pumpkins when the top inch of soil feels dry to the touch. As they grow, you can gradually increase the time between waterings.
What are some common pests that affect pumpkin plants?
Some common pests include aphids, whiteflies, and squash bugs. Regularly inspect your plants for signs of infestation, such as holes in leaves or a sticky substance on the stems. Use organic pest control methods whenever possible to maintain a healthy ecosystem.
Can I grow multiple types of pumpkins from one patch?
Yes! Pumpkin varieties can be cross-pollinated, resulting in unique characteristics and flavors. Try growing several different types together for a diverse harvest and interesting combinations.
How do I know if my pumpkin is ripe for harvesting?
Check the rind for a hard, smooth surface and a deep orange color. Avoid over-ripe pumpkins, as they can become mushy and unpalatable. Gently tug on the stem to see if it comes off easily – this indicates the pumpkin is ready.
Can I use seeds from store-bought pumpkins to plant my own?
Yes, but the resulting plants may not produce identical fruit or have the same characteristics as the parent plant. For best results, save seeds from your own homegrown pumpkins and experiment with cross-pollination techniques for unique varieties.