
As a parent, you’re always on the lookout for ways to foster your child’s creativity, fine motor skills, and self-expression. One fun and easy way to do just that is through the world of thumb print art! Thumb prints can become beautiful works of art when paired with imagination and a little bit of creativity. But did you know that creating with thumb prints is also an excellent way to develop your child’s fine motor skills? In this article, we’ll delve into the wonderful world of thumb print patterns for kids, exploring how to encourage their creativity through fun and easy projects. We’ll cover everything from simple activities to more complex techniques, so whether you’re a seasoned parent or just starting out, you’ll find something to inspire your little ones.
Understanding Thumb Print Basics
Let’s take a closer look at how our little ones’ unique thumb print patterns are formed and what makes each one special. We’ll explore the basics of thumb printing together!
What Are Thumb Prints?
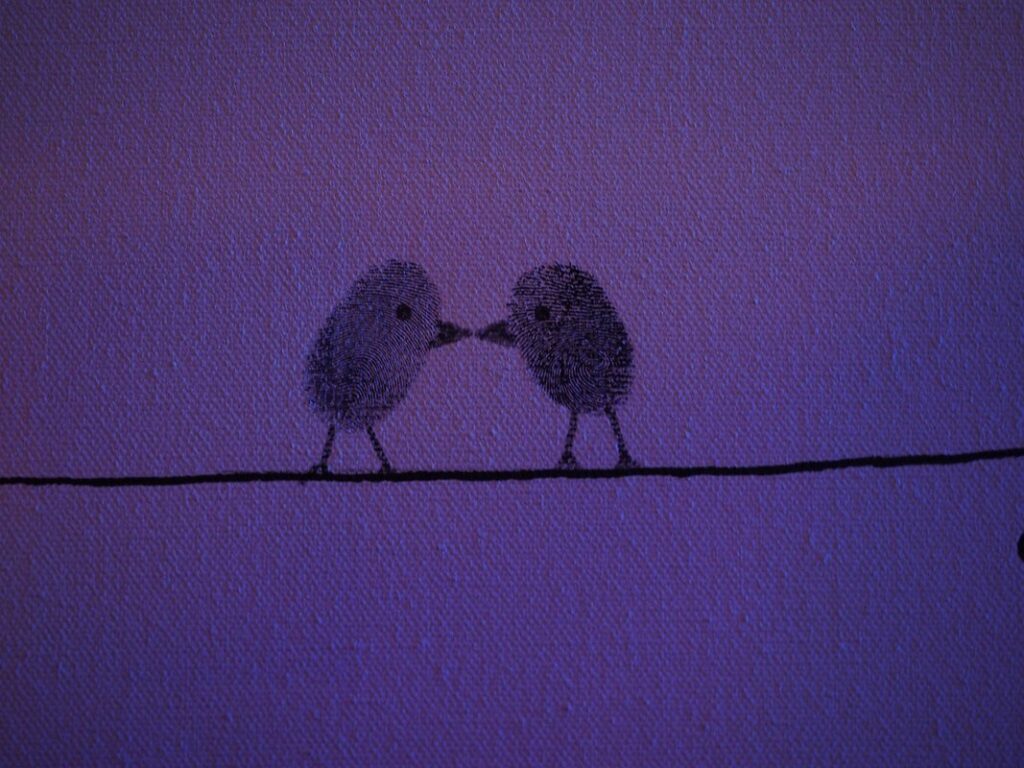
So, you want to know what thumb prints are? Well, let’s dive right in! Thumb prints are unique patterns made by pressing the tip of a child’s thumb into a surface. They can be created using various materials like paint, ink, or even clay.
When it comes to making thumb prints, the process is quite simple. All you need is a clean and dry surface for your child to press their thumb onto. You can use paper, cardboard, or even a special type of paper designed specifically for creating art with fingerprints.
One great thing about thumb prints is that they’re extremely versatile. They can be used in various art projects, from making cards and gift tags to decorating walls and windows. Some popular materials for creating thumb prints include tempera paint, washable ink pads, and modeling clay.
Remember, the most important part of making thumb prints is to have fun! Encourage your child to experiment with different techniques and materials to create unique patterns and designs. Who knows what masterpiece they’ll come up with?
Benefits of Thumb Printing for Kids
Thumb printing can be an incredibly beneficial activity for kids, offering a range of advantages that extend far beyond creating beautiful artwork. One of the most significant benefits is the development of fine motor skills, which are essential for future academic and professional success.
As children engage with thumb printing, they’ll begin to refine their hand-eye coordination, dexterity, and finger control – all critical components of fine motor skill development. This can be particularly helpful for young ones who struggle with tasks such as buttoning shirts or using utensils during meals.
Thumb printing also provides an outlet for creativity and self-expression, allowing kids to experiment with different techniques, colors, and patterns. By exploring various styles and designs, children can develop their imagination and problem-solving skills while having fun in the process. To encourage your child’s creative journey, try setting up a dedicated space for art exploration or incorporating new materials like stampers or textured paints into their activities.
As you support your child through this creative journey, remember to focus on the process rather than the end result – it’s about the joy and learning that comes from making art, not just creating a perfect piece.
Materials Needed for Thumb Print Art
To get started on creating beautiful thumb print patterns, you’ll need some essential materials that are easy to find at home or in a craft store. Gather these items before we dive into the fun part!
Choosing the Right Paint or Ink
When it comes to choosing the right paint or ink for thumb print art, there are several options available. Watercolor paint is a popular choice for kids’ artwork because it’s easy to clean up and produces beautiful, translucent colors. Tempera paint is another option that works well with finger painting, but be aware that it can take longer to dry than watercolor.
Acrylic paint is a great choice if you’re looking for vibrant, long-lasting colors. However, it may not be the best option for young children because it’s more difficult to clean up and can stain skin and surfaces. When choosing paint or ink for thumb print art, consider the age and skill level of your child.
For younger children, watercolor or tempera paint might be a better choice. For older kids who are more confident with their fine motor skills, acrylic paint could work well. Always supervise your child when using any type of paint or ink to ensure they’re following proper safety precautions.
Other Materials to Consider
While thumb print paint is the primary medium for creating thumb print art, there are other materials you can use to enhance and add texture to your child’s artwork. Paper and cardstock are popular alternatives that work well with thumb prints. You can use regular printing paper or construction paper to create unique textures and patterns. Cardstock, on the other hand, provides a more durable surface that’s perfect for creating three-dimensional art.
You can also experiment with fabric as a material for thumb print art. Cotton fabric, in particular, is ideal because it absorbs paint well without becoming too soggy. Simply lay out your child’s thumb print on the fabric, and let it dry completely before washing and ironing to create a one-of-a-kind textile art piece.
If you’re looking for more unusual materials, consider using recycled paper or even old music sheets as a base for your child’s thumb print art. These unconventional materials can add an extra layer of creativity and meaning to the artwork.
Basic Thumb Print Techniques
To create a variety of thumb print patterns, let’s start by mastering some simple techniques that will bring your artwork to life. We’ll cover the basics together!
Finger Painting Basics
When it comes to creating beautiful thumb print patterns with finger painting, mastering the basics is key. First and foremost, let’s talk about holding the brush – and I mean “brush” loosely here, as we’ll be using our fingers instead! It’s essential to hold your hand out flat with fingers spread apart, allowing the paint to flow smoothly from the tip of each digit.
To apply the perfect amount of pressure, experiment with different finger placements on the paper. Try holding a single finger against the surface for more defined lines or use multiple fingers together for broader strokes. To blend colors and create subtle transitions between hues, gently lift your fingers as you move them across the page – this will help to merge the paint without creating hard edges.
Now, let’s talk texture! For a fun, swirly effect, try dipping your fingers in one color of paint, then immediately placing another finger with a different color on top. As you lift your second finger, watch as the two colors swirl together on the paper. With practice and patience, you’ll be creating stunning thumb print patterns like a pro!
Creating Patterns with Thumb Prints
Creating patterns with thumb prints is an exciting way to encourage kids to think creatively and explore their artistic side. To get started, you can try layering different thumb print colors on top of each other using paint or ink pads. For example, start by applying a light blue thumb print to your paper, then add layers of yellow, green, and finally red. Watch as the colors mix and blend to create a beautiful marbled effect.
Experiment with using multiple fingers to create patterns too! Try making alternating thumb prints with different fingers, or creating a series of small circular prints to resemble bubbles in a fizzy drink. You can even use your non-dominant hand to add an extra layer of interest to your design.
To take it up a notch, try experimenting with different materials like foam plates, sponges, or even household items like potatoes and carrots! These unique textures will create interesting patterns when pressed onto paper. So don’t be afraid to get messy and have fun exploring the endless possibilities of thumb print art!
Advanced Thumb Print Techniques
Now that you’ve mastered basic thumb print techniques, let’s dive into some more creative and intricate ways to add unique details to your artwork. Get ready for a splash of personality!
Using Thumb Prints in Combination with Other Art Forms
Using thumb prints in combination with other art forms is a great way to add depth and interest to a piece. For example, you can use your child’s thumb print as the main image, and then surround it with collage elements like paper shapes or fabric scraps. This creates a visually appealing contrast between the soft texture of the thumb print and the more rigid texture of the collage pieces.
Another fun way to combine thumb prints with other art forms is through stamping. You can use your child’s thumb print as a stamp, applying paint or ink directly onto the paper, and then layer it on top of other stamped images. This creates a unique, multi-layered effect that adds dimension to the artwork.
You can also experiment with combining thumb prints with other materials like glitter, sequins, or even found objects. For instance, you could use your child’s thumb print as the background image, and then add intricate details using glitter glue or markers. The possibilities are endless, and it’s a great way to encourage kids to think creatively and try new things. By combining thumb prints with other art forms, you can create truly one-of-a-kind pieces that showcase your child’s unique style and personality.
Tips for Creating Realistic Images with Thumb Prints
Creating realistic images with thumb prints requires a combination of technique and creativity. To achieve detail and texture, encourage kids to experiment with different pressure levels on the paper. Suggest they press their thumbs firmly for darker areas and softly for lighter ones. This will help them build up shading and create depth in their artwork.
When working with materials like paint or ink, demonstrate how to layer colors to achieve a realistic look. For example, have kids start with a base color, then add layers of thinner paint or ink on top to create subtle blending effects. Remind them to experiment with different brushstrokes, such as swirling or dabbing, to add texture and interest.
Tips for working with materials include using a variety of textures, like burlap or felt, to add unique patterns and depth to their artwork. Also, suggest they try using household items, like sponges or credit cards, to create different effects when stamping their thumb prints.
Encouraging Creativity in Children
Helping children tap into their creative potential can be a fun and rewarding experience for both of you, and it’s amazing how something as simple as art supplies can spark imagination.
Setting Up a Creative Space
Creating a space that fosters creativity and experimentation is crucial when engaging kids with thumb print patterns. To begin, it’s essential to designate an area where they can express themselves freely without worrying about making messes. Covering surfaces with newspaper or a plastic tablecloth will help protect against stains and make cleanup easier. You may also consider investing in washable paint smocks for each child to wear, reducing the risk of clothes getting stained.
In addition to these precautions, think about setting up an art station with materials like paper, paint, and various textures that can be incorporated into thumb print patterns. Provide a variety of tools, such as sponges, foam brushes, or even household items like squeegees, to encourage kids to experiment with different techniques.
Lastly, keep the space well-ventilated and maintain good lighting, allowing your child to easily see what they’re creating. This will enable them to focus on their project without distractions and ensure a more enjoyable experience.
Tips for Parents and Caregivers
As a parent or caregiver, you play a significant role in fostering creativity in children. When introducing thumb print patterns to your little ones, remember that exploration and experimentation are key to their creative development. To encourage this, set up an inviting space for art-making where your child can freely express themselves.
Start by providing various materials like paint, ink pads, and even food coloring mixed with soap for a fun twist. Encourage your child to experiment with different techniques, such as layering colors or applying pressure in unique ways. You can also engage them in conversations about texture, color mixing, and pattern creation – ask open-ended questions that promote critical thinking.
To take it a step further, try incorporating games and activities into your creative sessions. For instance, create a “fingerprint city” where children can add buildings, roads, and other features using their thumb prints as blocks. Be sure to offer positive reinforcement and praise their efforts, even if the outcome isn’t what you expected – this will help build confidence and encourage continued exploration.
By embracing your child’s natural curiosity and providing an environment that nurtures creativity, you’ll be helping them develop essential skills for future success.
Conclusion
As we come to a close, let’s recap the unique thumb print patterns your little ones are likely to develop and how to encourage their hand growth.
Summarizing the Benefits of Thumb Print Art
Thumb print art may seem like a simple and fun activity for kids, but it offers numerous benefits that can have a lasting impact on their development. One of the most significant advantages is its ability to help children develop their fine motor skills. As they press their thumbs onto the paper, they’re improving their hand-eye coordination, dexterity, and control.
This activity also encourages creativity and self-expression. By allowing children to explore different colors, shapes, and patterns, thumb print art fosters a sense of imagination and experimentation. It’s not uncommon for kids to create unique designs and textures that reflect their personality and interests.
To maximize the benefits of thumb print art, try incorporating it into your child’s daily routine. Set aside time each week for them to create with their thumbs, using various materials such as paint, ink, or even shaving cream. Encourage them to experiment with different techniques, like swirling, dotting, or creating patterns.
By making thumb print art a regular activity, you’ll be supporting your child’s cognitive and creative growth while having fun together!
Next Steps: Encouraging Ongoing Creativity
As you’ve guided your child through their first thumbprint art project, it’s essential to keep the creative momentum going. At this stage, it’s not about creating another masterpiece but about nurturing a curiosity-driven approach to art-making. Encourage experimentation with new materials and techniques by exploring various textures, colors, and tools.
For instance, you could try using finger paints or pastels alongside their thumbprints to create unique blends of color and texture. You might also introduce other handprints, like footprints or palm prints, to add more dimension to their artwork. Don’t be afraid to get messy and explore unconventional materials, like sand, glitter, or even coffee grounds.
To keep things fresh, try rotating projects every few weeks. This will prevent boredom and give your child a chance to develop new skills without getting stuck in a rut. Make it a point to display their work prominently, either on the fridge or a dedicated art wall, to boost their confidence and encourage them to continue expressing themselves creatively.
Frequently Asked Questions
What if my child’s thumb print doesn’t turn out as expected? Can I still make it work?
If your child’s first attempt at creating a thumb print pattern doesn’t quite meet expectations, don’t worry! Encourage them to try again and experiment with different techniques. You can also try mixing media – like combining paint with ink or clay – to create unique textures and patterns.
How long does the painting process typically take for young children?
The beauty of thumb printing is that it’s a flexible activity that can be adapted to your child’s attention span. Typically, younger children (ages 2-3) may need shorter sessions (15-20 minutes), while older kids (4-6) can engage in longer activities (30-40 minutes).
Can I make thumb prints with other parts of the hand besides just the thumb?
Absolutely! While the thumb is the most common choice, you can also experiment with making impressions using fingers, toes, or even the whole palm. Just be sure to use a larger surface area and adjust your materials accordingly.
How do I store and display my child’s thumb print art pieces over time?
To preserve their creations, encourage your child to handle their artwork gently and avoid touching the paint or ink directly. For storage, consider using acid-free paper or cardboard to prevent damage over time. As for displaying their work, consider framing or laminating their favorite pieces to showcase them proudly.
Can I use digital tools or software to create thumb print art with my child?
Yes! With the rise of digital art software and apps, you can now explore new ways to create thumb print-inspired art together with your child. Programs like Adobe Photoshop or Procreate offer a range of digital brushes and tools that mimic traditional painting techniques, making it easy to experiment with different effects and styles.