
Get ready to unleash your child’s creativity and imagination as we explore the endless possibilities of repurposing toilet rolls! You might be thinking, “What can I make with something as ordinary as a toilet roll?” But trust us, it’s about to become a treasure trove of fun and educational projects. From cute animals and colorful puppets to masks and science experiments, there’s no limit to what your little ones can create.
In this guide, we’ll show you how to turn these humble rolls into engaging activities that foster imagination and learning. Whether you’re a parent looking for new ideas or an educator seeking innovative ways to teach, our list of creative projects is sure to inspire. So, grab some toilet rolls and let’s get started on this fun journey together!
Introduction to Repurposing Household Items
Get creative and breathe new life into old household items, as we explore simple ways to repurpose everyday objects for fun kids’ projects. From toilet rolls to cardboard tubes, the possibilities are endless!
Benefits of Engaging in DIY Crafts with Children
Engaging your kids in DIY crafts is an excellent way to nurture their creativity, responsibility, and learning skills. By doing so, you’re not only keeping them entertained but also helping them develop essential life skills that will benefit them in the long run.
One of the most significant advantages of involving kids in creative activities is that it encourages self-expression and imagination. When they’re given the freedom to explore and experiment with different materials, they learn to think outside the box and come up with innovative ideas. This helps build their confidence and allows them to express themselves in a more meaningful way.
DIY crafts also teach children important life skills like responsibility and resourcefulness. By participating in projects that involve repurposing household items, kids develop an understanding of the value of reuse and recycling. They learn to appreciate the resources available to them and become more mindful of their actions.
Incorporating DIY crafts into your daily routine can be as simple as setting aside 15-20 minutes each day for creative activities with your child. Choose a project that suits their interests, such as making a toilet roll bird feeder or picture frame, and let them take the lead in creating something unique and special.
Essential Materials and Safety Precautions for Parents
Before diving into the fun and creative world of repurposing toilet paper rolls with your kids, it’s essential to ensure you have the right materials on hand. To get started, gather the following items:
• A variety of craft supplies like scissors, glue, tape, and markers
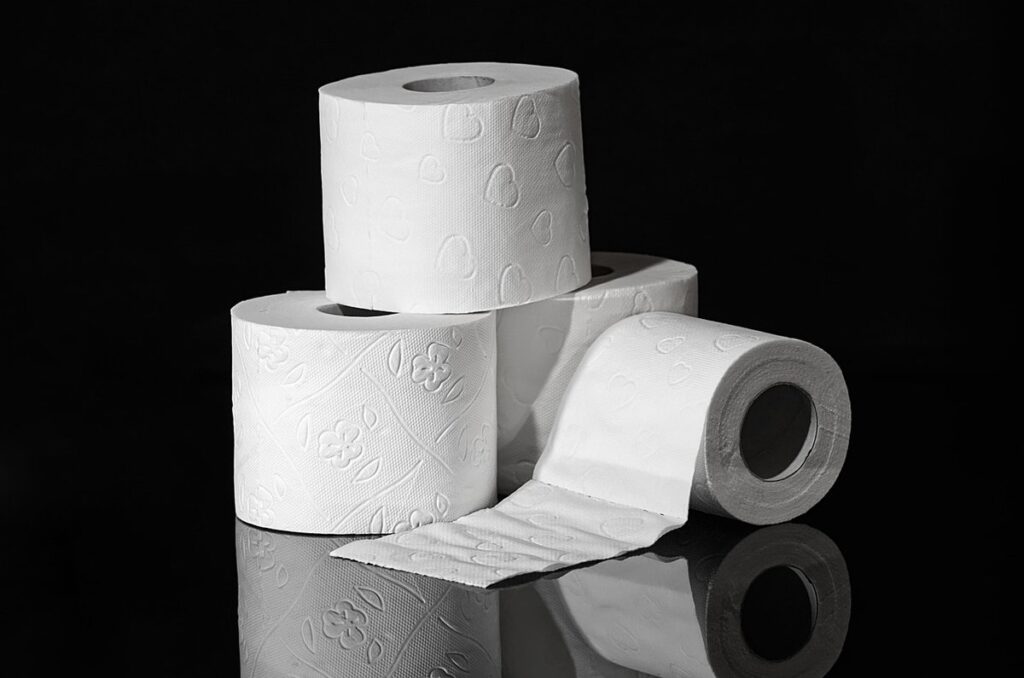
• Toilet paper rolls (the more the merrier!)
• Construction paper or other colorful materials for decoration
• Glue sticks, staples, or a hot glue gun for added stability
When working on crafts with children, safety should always be your top priority. Here are some precautions to take:
* Supervise your child at all times, especially when handling sharp objects like scissors or hot glue guns.
* Use kid-friendly materials and tools, such as blunt-tipped scissors or plastic knives, to avoid accidents.
* Designate a specific workspace for crafting, clear of clutter and tripping hazards.
* Teach your child about proper handwashing techniques after handling art supplies.
By being prepared with the right materials and following these safety guidelines, you’ll be well on your way to creating unforgettable memories and inspiring your child’s creativity.
Toilet Roll Animal Creations
Get creative and make some adorable animal friends using nothing but toilet rolls, glue, and your imagination! Let’s bring these fun characters to life together.
Crafting a Simple Penguin Using Toilet Rolls
To create a charming penguin using toilet rolls, start by gathering the necessary materials: toilet rolls, white glue, scissors, black paint or markers, and any additional embellishments you like. Begin by cutting out two identical shapes from one of the toilet rolls to form the body of your penguin. You can use a template or draw the shape freehand – this will depend on the age and skill level of the child.
Next, take another toilet roll and cut it into smaller sections for the flippers. Use glue to attach these to either side of the body. Paint or color in the beak and add some coal-like details to create the classic penguin look.
To finish off your adorable penguin, use a small piece of cardboard or cardstock to create a base. Glue this under the body and let it dry completely before handling. Consider adding other details like eyes or an orange beak made from construction paper. With these simple steps, kids can easily create their very own toilet roll penguins!
Designing a Cute Bunny with Recycled Materials
When transforming toilet rolls into adorable bunnies, creativity knows no bounds! Encourage kids to think outside the box and get crafty with recycled materials. To start, collect a few basic supplies: a toilet roll, some fluffy cotton balls or wool for whiskers, felt or construction paper for ears, glue, scissors, and a marker.
Show your mini-me how to shape the toilet roll into a bunny body by gluing two small pieces of cardboard or paper strips at the bottom to create legs. Next, cut out two triangular shapes from the felt or construction paper for the ears and attach them to the top of the head using glue. For whiskers, simply stick the cotton balls or wool onto the sides of the face with a dab of glue.
To add some extra personality, use markers to draw on cute bunny features like eyes, nose, and mouth. Encourage your little ones to experiment with different textures and colors to bring their bunnies to life! This fun project not only promotes fine motor skills but also sparks imagination and creativity – the perfect combination for a fun and engaging activity.
Puppets and Masks Made from Toilet Rolls
Get creative and make some fantastic puppets and masks using toilet rolls, perfect for dress-up play and imaginative storytelling with your little ones!
Creating Fun and Colorful Hand Puppets
Turning toilet rolls into hand puppets is an excellent way to encourage kids to engage in imaginative play and storytelling. By following a few simple steps, you can create colorful and fun characters that will bring hours of entertainment to your little ones.
First, collect several toilet rolls and let the kids decorate them with paint, markers, or stickers. You can also add some glue, scissors, and other craft supplies to make it a collaborative effort. Encourage them to think about their puppet’s personality, name, and backstory. This will help them develop their language skills as they practice telling stories and dialogues.
Once the puppets are decorated, cut out mouths and any additional details you like (like arms or legs). Use a marker or paint to draw eyes, hair, and other facial features. Finally, bring your puppet to life by using your hands to create movement and expression. You can even record a short play or story with multiple puppet characters to help kids practice their language skills further.
This fun activity not only fosters creativity but also helps develop essential communication skills in young children.
Designing Masks for Imaginative Play with Recycled Materials
Transforming toilet rolls into masks is an excellent way to encourage imaginative play and self-expression in children. Not only are these materials eco-friendly, but they also offer a blank canvas for kids’ creativity. To get started, gather some recycled materials such as old CDs, cardboard tubes, scissors, glue, and paint.
To design a mask with recycled materials, begin by cutting out shapes from the toilet roll to create eye holes, mouth, or other features. You can use cardboard tubes to create 3D embellishments like nose guards or eyebrows. Old CDs make excellent decorative elements that add an extra layer of creativity. Kids can glue and arrange these components to create a unique design.
Consider encouraging children to think about the character they want to embody. For example, a pirate’s mask might require more elaborate details like eye patches or chin straps made from cardboard strips. A superhero cape could be fashioned from a plastic bag or a strip of fabric tied around the neck. By allowing kids to take charge of their creative process, you’re fostering an environment that encourages self-expression and imaginative play.
Educational Science Experiments with Toilet Rolls
Get creative and learn at the same time with these fun and easy educational science experiments that use toilet rolls as a key ingredient! They’re perfect for curious kids.
Investigating Sound Waves Using a Toilet Roll
Sound waves are all around us, but have you ever stopped to think about what they actually are? They’re a type of vibration that travels through the air as pressure waves, causing our ears to detect different frequencies. But how can we make these abstract concepts more tangible for kids?
One simple way to explore sound waves is by using a toilet roll. Take two toilet rolls and stretch them out so they hang straight down from opposite ends of a table or surface. Hold one end of each roll in place with some tape, leaving the middle section free.
When you speak into one end of the first roll, your voice will create vibrations that travel through the air to reach the second roll. The sound waves will cause the toilet roll to vibrate, and if it’s stretched tightly enough, you should be able to see the wave-like motion on its surface.
This experiment not only demonstrates the principle behind sound waves but also showcases how they can transfer energy from one object to another. It’s a great way to get kids thinking about the physical properties of sound and how our voices affect the world around us. Encourage them to explore different frequencies by speaking into the toilet roll at various volumes – what happens when you whisper versus shout?
Conducting a Basic Physics Experiment on Air Pressure
Conducting a basic physics experiment on air pressure using a toilet roll is an engaging and easy activity to set up for kids. To start this experiment, you’ll need a few simple materials: a toilet roll, a balloon, a straw, and some tape. Blow up the balloon tightly and then insert the straw into one of the toilet roll’s ends. Secure the straw with tape so it doesn’t come out.
As you blow air through the straw, watch as the balloon is slowly pushed into the toilet roll. This demonstrates how air pressure works – when air molecules are compressed in a confined space (in this case, inside the straw), they exert more force on surrounding objects. As more air molecules get added to the straw and push against the balloon, it gets slowly forced into the toilet roll.
This experiment is perfect for young kids who want to learn about basic physics concepts in an entertaining way. Encourage them to test how different variables affect air pressure – such as changing the tightness of the balloon or altering the temperature of the environment.
Sensory Play Ideas Using Toilet Rolls
Get ready for some creative fun as we explore the amazing world of toilet roll crafts, starting with our favorite sensory play ideas that’ll delight kids of all ages!
Creating a Texture Ball with Toilet Roll and Glue
Creating a texture ball with toilet rolls is an excellent way to engage your little ones’ sense of touch and exploration. To make this sensory ball, you’ll need some toilet rolls, white glue, scissors, and various textures such as fabric scraps, sandpaper, or even dried beans.
Start by cutting the toilet rolls into smaller pieces, depending on how big you want your texture ball to be. Then, apply a generous amount of white glue to one half of the toilet roll piece and attach another piece on top. Continue this process until you have several layers. This will create a sturdy base for your texture ball.
Next, cut various textures into small pieces and apply them to different areas of the glue-covered toilet rolls. For example, you could add some sandpaper for a scratchy feeling or fabric scraps for a soft texture. Experiment with different combinations to create unique sensations. Once you’ve added all the textures, let it dry completely.
To use this sensory ball, simply roll it around in your child’s hands, encouraging them to explore and identify the various textures. This activity is perfect for developing tactile awareness and fine motor skills. You can also store it in a bin or container with other toys for continuous play.
Developing Fine Motor Skills with Toilet Roll-based Sensory Bottles
Developing Fine Motor Skills with Toilet Roll-based Sensory Bottles is an engaging and interactive way to encourage children’s exploration. Fill a toilet roll with different textures like beads, rice, beans, or sand, and add some oil or water to create a sensory experience. You can also include small toys, pom-poms, or other objects for kids to discover.
To enhance this activity, you can experiment with various scents by adding essential oils or fragrances to the mixture. For example, lavender oil promotes relaxation, while citrus-based oils stimulate the senses. Place the toilet roll in a container filled with water and let the child manipulate it using their hands, promoting dexterity and fine motor skills.
To take this activity further, try threading small objects like beads or pipe cleaners onto the toilet roll for children to string together. This task requires coordination between the hands and fingers, making it an excellent way to develop hand-eye coordination.
Additional Crafts and Activities with Toilet Rolls
Get creative and have some fun with these fantastic additional crafts and activities that use toilet rolls as their main material, from puppets to picture frames.
Transforming Toilet Rolls into Unique Wind Chimes
Transforming toilet rolls into unique wind chimes is a fun and creative way to get kids engaged with music and sound. To start, gather toilet rolls, some metal washers, a few pebbles or small beads, a piece of string or twine, and a pair of scissors. You can also add other embellishments like sea glass, shells, or even small bells to give your wind chimes a personal touch.
Cut the toilet roll into equal lengths, depending on how long you want each segment to be. Next, thread a metal washer onto one end of each piece, followed by a pebble or bead, and finally tie a knot at the top with the string. Hang the pieces from a branch or a mobile, making sure they are spaced evenly apart. As the wind blows, the washers will strike against the toilet roll, creating a unique sound.
Encourage kids to experiment with different materials and arrangements to create their own distinct soundscapes. You can also involve them in choosing the embellishments, such as selecting specific types of pebbles or beads that produce a desired pitch. This project is not only fun but also develops children’s fine motor skills, creativity, and auditory awareness.
Making Paper Flowers Using Toilet Rolls
Making beautiful paper flowers using toilet rolls is an excellent way to introduce kids to the world of crafting and creativity. Not only will they have fun turning something mundane into a stunning work of art, but they’ll also learn about texture, color, and design. To get started, you’ll need some basic supplies: toilet rolls, scissors, glue, and colored paper or tissue paper in various colors.
Begin by cutting the toilet roll to create individual petals. You can fold them into quarters or use a template for a more precise look. Next, cut out petal shapes from colored paper and have your child arrange them around the center of each toilet roll. Glue the petals in place, starting with the bottom layer and working their way up. To add dimension, you can use a toothpick or small stick to create texture by gently inserting it between the layers.
Remember, the beauty of paper flowers lies in their imperfections, so encourage your child to experiment and try new things! As they work on creating multiple blooms, you’ll notice their fine motor skills improve and their imagination grow.
Conclusion and Encouragement to Keep Creating
You’ve made it through all our creative projects, now it’s time to keep the fun going! Let’s wrap up what we’ve learned and encourage you to continue making with toilet rolls.
Recap of Benefits and Fun Ideas for Kids
As we wrap up our exploration of creative projects to make with toilet rolls for kids, let’s take a moment to appreciate the value these activities bring to young minds. Engaging in arts and crafts with children not only fosters their creativity but also helps develop fine motor skills, hand-eye coordination, and problem-solving abilities.
The projects we’ve outlined are perfect examples of how simple materials can be transformed into exciting creations that promote learning through play. From decorating toilet roll dolls to building unique bird feeders, these activities encourage kids to think outside the box and explore their imagination.
To make the most of these creative pursuits with your little ones, remember to keep it fun and interactive. Encourage them to experiment with different materials and techniques, even if it means making a mess! Be willing to join in on the fun yourself – kids love seeing their parents engage in playful activities alongside them.
By incorporating arts and crafts projects like these into your daily routine, you’ll be nurturing a lifelong passion for creativity in your child. So don’t be afraid to get crafty and keep those creative juices flowing!
Tips for Parents on Continuing the Creative Journey
As you’ve explored the world of toilet roll crafts with your child, you might be wondering what’s next. How do you continue to foster their creativity and keep them engaged in making things? The truth is, kids are naturally curious and love to create – it’s up to us as parents to encourage and support this journey.
One way to keep the creative momentum going is to establish a dedicated space for crafting and creativity. This could be a corner of your home office or a entire room set aside for arts and crafts. Make sure it’s well-stocked with materials, including paper, glue, scissors, and paint. This will give your child the freedom to explore their imagination without worrying about supplies.
You can also try to plan regular family craft sessions, where you and your child work on a project together. This is a great way to bond over creativity while teaching each other new skills. Make it a special treat by offering snacks or drinks while you create.
Frequently Asked Questions
How can I involve kids with different skill levels or abilities in these DIY crafts?
You can easily adapt most of these projects to accommodate children with varying skills and abilities. Start by breaking down the steps into simpler tasks, providing extra support when needed, and allowing them to choose their own pace. This will help ensure everyone feels included and confident.
Can I use toilet rolls for crafts beyond just making animals or puppets?
While the main article focuses on these creative outlets, you can repurpose toilet rolls in numerous other ways. Consider using them as bases for 3D sculptures, adding them to collages, or even transforming them into shakers for music experiments.
How do I store and organize toilet roll materials when working with a group or multiple children?
To maintain order and make clean-up easier, designate a specific area for toilet rolls and related supplies. Use bins or containers labeled with the project name to keep everything organized and within reach.
Can I use this guide as a basis for creating custom lesson plans or educational curricula?
Yes! This resource is perfect for educators seeking innovative ways to teach various subjects like science, art, or language arts. Simply tailor the projects to fit your curriculum requirements and adapt them to suit your students’ age groups and skill levels.
What are some tips for involving kids in more complex science experiments using toilet rolls?
When introducing more advanced scientific concepts, start by explaining the theory behind the experiment and demonstrating each step before letting kids participate. Emphasize the importance of safety precautions and encourage teamwork and collaboration throughout the process.