
As the snowflakes start to fall outside, it’s the perfect time to get creative with your preschooler indoors. Winter is a magical season, full of wonder and excitement for little ones. But have you ever stopped to think about how much joy they can derive from making their own winter art? Not only does it encourage self-expression and imagination, but it’s also a great way to develop fine motor skills and creativity. In this article, we’ll explore some engaging winter art projects perfect for preschoolers, including paper snowflakes, handprint reindeer, and pinecone crafts. We’ll share our top tips for a fun and safe art experience that you can try at home with your child, ensuring hours of creative play and making memories to last a lifetime.
Getting Started with Winter Art
Welcome to winter art, little ones! Let’s get started with some fun and easy projects that will spark your creativity and imagination during the chilly months.
Preparing Your Space and Materials
Before you begin creating winter art with your preschoolers, it’s essential to set up a safe and inviting space that will foster creativity and fun. Start by clearing off a large table or workspace and covering it with paper or a plastic tablecloth to make cleanup easier. You’ll also want to have a designated area for messy materials like paint, glue, and markers.
Next, gather all the materials you need for your winter art project and store them within easy reach. This will prevent clutter and reduce distractions during the activity. Make sure to have plenty of smocks or old shirts on hand to protect children’s clothing from stains. If you’re working with paint, consider using washable paint or tempera that can be easily cleaned up with soap and water.
To minimize messes and make cleanup a breeze, designate a “painting station” with a bin or tray for supplies like brushes, sponges, and paint. This will contain spills and prevent them from spreading to other areas of the room.
Introduction to Winter-themed Art
Getting started with winter-themed art projects for preschoolers is an exciting and creative way to engage young minds. Winter art is all about capturing the magic of snowflakes, cozy landscapes, and festive decorations that bring warmth to our homes during the cold months.
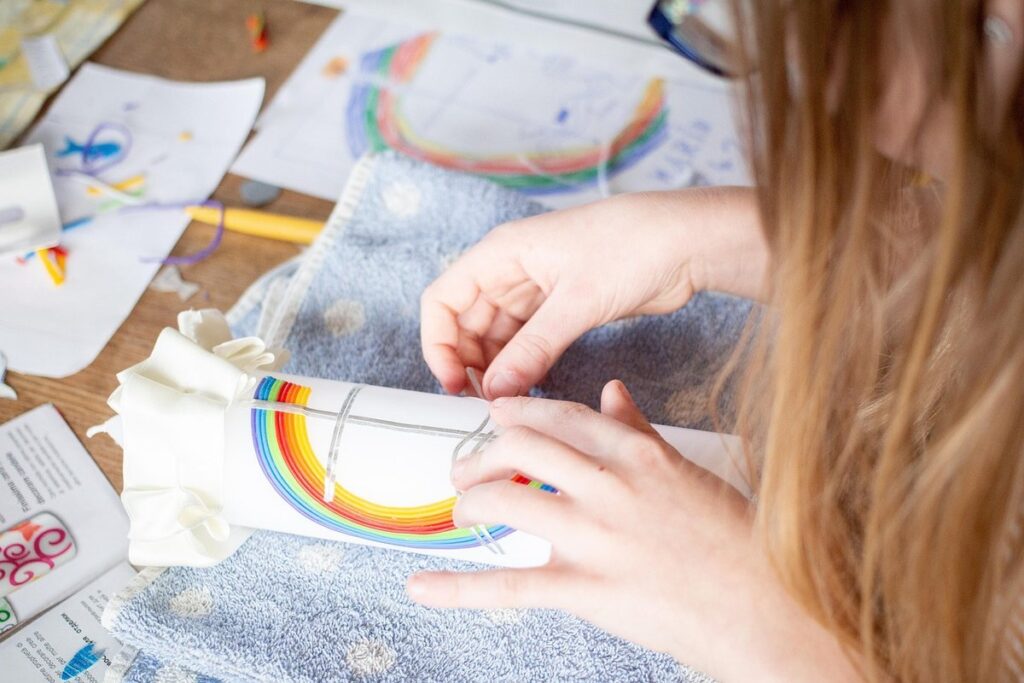
There are countless ways to explore winter-themed art with your little ones, from making paper snowflakes in various shapes and sizes to creating vibrant winter landscapes using paint, crayons, or markers. You can also encourage them to make festive decorations such as handprint wreaths, paper plate snowmen, or popsicle stick trees.
For younger preschoolers, a great starting point is to focus on basic techniques like folding, cutting, and pasting while making simple crafts like paper snowflakes or finger painting winter scenes. For older preschoolers, you can introduce more complex concepts like perspective drawing, layering textures, and experimenting with different materials like glitter, stickers, or even natural materials found outdoors.
Remember to always supervise your child during art activities and provide guidance when needed, but also allow them the freedom to explore and express their creativity.
Project 1: Snowflake Magic
Let’s dive into creating magical snowflakes with your preschooler using simple materials and techniques that will make their winter wonderland sparkle. This project is perfect for young artists to explore symmetry and creativity.
Making Paper Snowflakes with Preschoolers
Creating intricate paper snowflakes is a classic winter activity that’s perfect for preschoolers. Not only does it develop their fine motor skills and hand-eye coordination, but it also fosters creativity and imagination.
To make beautiful paper snowflakes with your little ones, start by folding a square piece of white paper in half diagonally to create a triangle. Then, fold the triangle in half again, creating another diagonal line. This will help you create symmetrical patterns on both sides of the paper.
Next, take the top two corners of the folded paper and fold them down towards the middle crease. Repeat this process with the other two corners, making sure they’re even and symmetrical. You can now unfold your paper to reveal a beautiful snowflake design. Encourage your preschoolers to experiment with different folding techniques and designs, and have fun watching their creativity shine through!
Decorating the Classroom with Snowflakes
As you and your preschoolers finish their snowflakes, it’s time to bring them together in a beautiful display that will add magic to your classroom. One of the most exciting parts of this project is using the finished snowflakes to decorate the room.
To create a visually appealing arrangement, consider grouping similar shapes or colors together. This can help create a cohesive look and make the display more dynamic. You can also experiment with layering different sizes and textures to add depth to your design. For example, hang larger snowflakes near the ceiling and use smaller ones towards the top of walls for a sense of movement.
To showcase your students’ masterpieces, consider creating a focal point in the classroom, such as a “Snowflake Gallery” or a “Winter Wonderland Corner.” Hang the snowflakes from the ceiling using fishing line or twine to create a whimsical and airy feel. Don’t forget to include a few special touches, like fairy lights or glittery garlands, to add extra sparkle.
Remember, the most important thing is to have fun with it! Encourage your students to get creative and experiment with different arrangements until they find one that makes them happy.
Project 2: Winter Wonderland Scenes
Create serene winter wonderland scenes with your preschooler using watercolor paints, glitter, and other festive materials to add a magical touch. Explore three enchanting projects together!
Creating a Winter Landscape Collage
Let’s create a beautiful winter landscape collage with our preschoolers! This activity is an excellent way to encourage their creativity and fine motor skills. To start, gather various materials such as paint, glue, pre-cut shapes (like snowflakes or trees), and construction paper.
Begin by laying out the background of your collage on a large piece of paper. You can use paint or markers to create a winter wonderland scene. Once the background is dry, it’s time to add some texture and dimension with glue and pre-cut shapes. Encourage your preschoolers to experiment with different textures, such as glittery snowflakes or 3D trees.
To make it more engaging, you can provide pre-made templates of winter scenes (like a snowy village or frozen lake) and let the children fill in the details using their favorite materials. For example, they can paint a blue sky or add sparkly glue to create snow-covered roofs.
Remember, this project is all about having fun and exploring different artistic techniques. Encourage your preschoolers to experiment and be creative!
Adding Details with Markers and Paints
Adding textures and details to our winter wonderland scenes can be so much fun with markers and paints! Let’s get creative!
You can start by using different types of markers like fine-tip pens, metallic markers, or even sparkly glitter markers to add intricate details to the scene. For example, you could draw snowflakes on the windows, add patterns to the tree bark, or create a frosty effect on the ground.
If you want to take it up a notch, grab some paints and experiment with different textures! You can use thick paint to create a snowy effect, or thin paint for a more icy look. Try using a sponge to dab on paint in a swirling motion to resemble snowdrifts. Or, use a small brush to paint individual snowflakes.
Remember, the key is to have fun and be messy (but not too messy)! Encourage your little artists to experiment with different colors and textures to add depth and interest to their winter wonderland scenes. Some great ways to incorporate markers and paints include:
• Drawing trees with layered branches for added dimension
• Creating a snowy village with tiny buildings and windows
• Painting a frozen lake or river with ice skaters or penguins
Project 3: Handprint Reindeer
Get ready for a fun and festive art project that’s perfect for little ones to create, where they’ll make adorable handprint reindeer using paint and paper. You’ll love how simple this craft is to set up!
Creating a Handprint Reindeer Art Piece
To create a handprint reindeer art piece that will surely delight your preschooler, follow these steps. Begin by painting your child’s hand brown and stamping it onto the paper to create the body of the reindeer. Use a smaller paintbrush to add a few strokes for the fur texture.
Next, help your child paint two triangles on top of the head for the antlers. You can also use stickers or small pieces of cardboard to create more realistic-looking antlers if you prefer. Make sure to leave enough space between the body and the antlers for the face.
Now it’s time for the fun part – adding features! Use a black paint to draw on the eyes, nose, and mouth. You can also add some personality to your reindeer by drawing on eyebrows or mustache. For a more festive touch, add some red or pink dots for the nose.
Finally, let your child’s imagination run wild by adding any additional details they’d like – such as buttons for the eyes, a scarf around the neck, or even a bell on the antlers.
Displaying Your Masterpiece
Now that you’ve created these adorable handprint reindeer, it’s time to show them off! Displaying your masterpiece is just as important as making it. You want to make sure everyone can enjoy the fruits of your labor.
First, let’s talk about displaying them in the classroom. You can create a special winter wonderland display on the wall or in a corner of the room. Use string lights or fairy lights to add a magical touch. Consider grouping the reindeer together with other winter-themed artwork to create a cohesive display. You could also use a large piece of cardboard or foam board as a backdrop and have the children arrange their reindeer on it.
At home, you can turn your child’s artwork into a fun holiday decoration. Frame each individual reindeer and hang them in a hallway or living room. Alternatively, you can create a collage by gluing multiple reindeer onto a large piece of paper or canvas. This will make for a unique and special holiday display that the whole family can enjoy.
Project 4: Pinecone Crafts
Let’s create some natural, wintery wonder with pinecones! We’ll make and decorate our own unique pinecone crafts using materials you likely have at home.
Decorating Pinecones with Glue, Paint, and Other Materials
Decorating pinecones is an excellent way to add some extra flair to your winter art projects for preschoolers. With just a few simple materials, you can transform plain pinecones into beautiful works of art that will be treasured long after the holiday season has passed.
To get started, gather a variety of materials such as white glue, acrylic paint, glitter, ribbons, and other embellishments like sequins or beads. You’ll also need some pinecones, which can usually be found at most craft stores or even in your own backyard. Let the children help you sort through the materials and decide how they want to decorate their pinecones.
Begin by applying a layer of glue to the pinecone using a paintbrush or your fingers. This will provide a sticky surface for the decorations to adhere to. Then, let the children get creative! They can paint the pinecones with bright colors, add sparkly glitter, or wrap ribbons around them. Some other ideas include sprinkling sequins on top of the glue or using beads to create intricate patterns.
The possibilities are endless, and the best part is that it’s okay if things get a little messy – after all, this is art!
Creating a Pinecone Bird Feeder
Creating a Pinecone Bird Feeder is a fun and easy winter art project that preschoolers will love. To get started, you’ll need some pinecones, peanut butter, bird seeds, and string or twine.
First, help your child spread a layer of peanut butter all over the pinecone using a butter knife. This sticky stuff will act as a glue to hold the bird seeds in place. Next, sprinkle a generous amount of bird seeds onto the pinecone, making sure they’re evenly coated. You can also add some extra goodies like chopped nuts or dried fruit for an added treat.
Once the peanut butter and seeds are on, help your child wrap a piece of string or twine around the middle of the pinecone to create a loop for hanging. This is where the magic happens! The birds will come to visit their new feeder whenever they see it outside the window.
Tips: Make sure to use fresh bird seeds that haven’t gone stale. You can also experiment with different types of seeds, like sunflower or Nyjer, which are high in oil and attract a variety of bird species. Have fun watching your creations bring joy to your backyard visitors!
Safety Reminders
When working on winter-themed art projects, it’s essential to keep safety top of mind for our little artists and their grown-ups. Let’s review some important precautions together.
Tips for Supervising Young Artists
When supervising young artists during winter-themed art projects for preschoolers, it’s essential to strike a balance between allowing their creativity to flourish and ensuring their safety. To prevent accidents, designate a specific area for art-making that is clear of tripping hazards and has easy access to cleaning supplies.
Encourage children to use washable paints and materials to minimize mess and make cleanup easier. Supervise closely when using scissors, glue, or other sharp objects, and teach the children how to properly handle them.
To foster creativity, provide a variety of art supplies and encourage exploration. For example, offer different textures like glitter, sandpaper, or fabric to add depth to their artwork. Consider projects that incorporate natural materials found outside during winter, such as pinecones, acorns, or evergreen branches.
Remember to guide the children’s imagination without dictating what they should create. Ask open-ended questions to prompt their thinking and encourage them to share their ideas with others. By striking this balance between creativity and safety, you’ll help young artists feel confident and inspired while exploring their winter-themed art projects.
Disposing of Art Supplies Safely
When you’re done with those festive winter art projects, it’s essential to dispose of art supplies responsibly. Let’s talk about how to safely get rid of paper scraps, paint jars, and other materials.
Start by separating recyclable materials from non-recyclables. Collect any clean, dry paper scraps and place them in a designated recycling bin or bag. This helps conserve natural resources and reduces waste. On the other hand, dispose of any soiled or contaminated papers in the regular trash.
For paint jars and art supplies with hazardous materials, check your local regulations for proper disposal guidelines. Many communities have special collection days for household hazardous waste (HHW). You can also donate leftover paint to schools, community centers, or Habitat for Humanity ReStores.
When disposing of other art supplies like markers, glue sticks, or crayons, make sure to follow the manufacturer’s instructions. Some may require special handling due to their chemical composition. If in doubt, err on the side of caution and dispose of them as hazardous waste.
Remember, responsible disposal is a crucial part of teaching preschoolers about sustainability and environmental stewardship. By modeling eco-friendly behavior, you’re encouraging a lifelong appreciation for taking care of our planet.
Conclusion and Extension Ideas
Now that you’ve completed these fun winter art projects, let’s wrap up our creative journey and explore ways to extend your child’s artistic expression even further.
Reviewing Progress and Celebrating Creations
As you near the end of your winter art projects with preschoolers, it’s essential to take a step back and review their progress. This not only helps you assess what worked well but also gives you an opportunity to celebrate their creations.
Begin by asking your preschoolers to reflect on their artwork. Ask open-ended questions like “What was your favorite part of making this project?” or “How did you think about using colors to show winter scenes?” This will help them articulate their thought process and give you insight into what they enjoyed most.
When reviewing the projects, take note of any patterns or common themes that emerge. Did many children choose to depict snowflakes or pinecones? Were there any unique materials used in a particular way? Use this information to inform future art projects and tailor them to your preschoolers’ interests.
Lastly, don’t forget to celebrate their creations! Set up an “art gallery” in the classroom where they can display their work for parents, teachers, or even themselves. Be sure to give each child a copy of their artwork as a keepsake – it’s a wonderful way to encourage their creativity and artistic expression.
Exploring Additional Winter-themed Art Projects
Now that you’ve explored the world of winter-themed art projects with your preschoolers, it’s time to take it up a notch! Whether you’re looking for ways to keep your little ones engaged during the school year or simply want to inspire their creativity, we have some exciting ideas to share with you.
Let’s start with some age-adapted suggestions: For older preschoolers (4-5 years), try introducing more complex techniques like layering and texture. For example, create a winter wonderland scene using watercolor paints on paper or a canvas. Use household items like glitter, sequins, or even shredded coconut to add an extra dimension to your artwork.
For younger preschoolers (2-3 years), focus on sensory exploration. Fill a container with shaving cream and have them shape and mold winter-themed shapes, like snowmen or trees. You can also create a “snowy” effect by mixing blue and white paint for a calming, serene look. Remember to always supervise your child during these activities and encourage their creativity.
Lastly, consider adapting these projects to suit different abilities and needs within your group. For instance, if you have children with mobility issues, try using adaptive tools or modifying the project to reduce physical strain.
Frequently Asked Questions
How can I ensure my preschooler’s artwork doesn’t get ruined during the winter season?
To prevent damage, consider using watercolor paints or washable markers that are specifically designed for little ones’ creations. You can also provide a designated drying area with paper towels to help them dry their artwork before displaying it.
What materials can I use as an alternative to traditional paint for winter art projects?
Besides traditional paint, you can try using tempera, watercolors, or even food coloring mixed with glue for a fun and non-toxic option. Just remember to supervise your child during the painting process to avoid any accidents.
How do I encourage my preschooler to be more creative in their artwork?
Encourage experimentation by providing various materials like glitter, sequins, or colored pencils. You can also ask open-ended questions to stimulate their imagination, such as “What do you think this pinecone would look like with some sparkly decorations?”
Can I use recycled materials for winter art projects, and how can I make it more engaging?
Yes! Using recycled materials like old CDs, cardboard tubes, or newspaper is a great way to promote eco-friendliness. To make it more engaging, try incorporating different textures and smells, such as glittery glue or scented markers.
How long does it take for the artwork created during winter art projects to dry completely?
The drying time will depend on the materials used and the thickness of the paint. Generally, it can take anywhere from a few minutes to an hour or more, depending on the specific project. Be patient and encourage your child to wait until the artwork is fully dry before displaying it proudly!