
Are you ready to get creative with your little ones this fall season? Pumpkin painting is a classic Halloween tradition that’s perfect for kids to unleash their imagination and creativity. Not only is it a great way to spend quality time together, but it also makes for a wonderful keepsake at the end of the day. In this guide, we’ll show you how to make pumpkin painting a lasting tradition in your household with some fun and easy ideas.
We’ll cover traditional designs that are perfect for kids, as well as some clever techniques to help them get started. Of course, safety always comes first, so we’ll also share some essential precautions to take when working with paint and pumpkins. From simple stencils to intricate patterns, our guide has something for every child (and adult!) to enjoy. So grab your favorite pumpkin-painting supplies and let’s get creative!
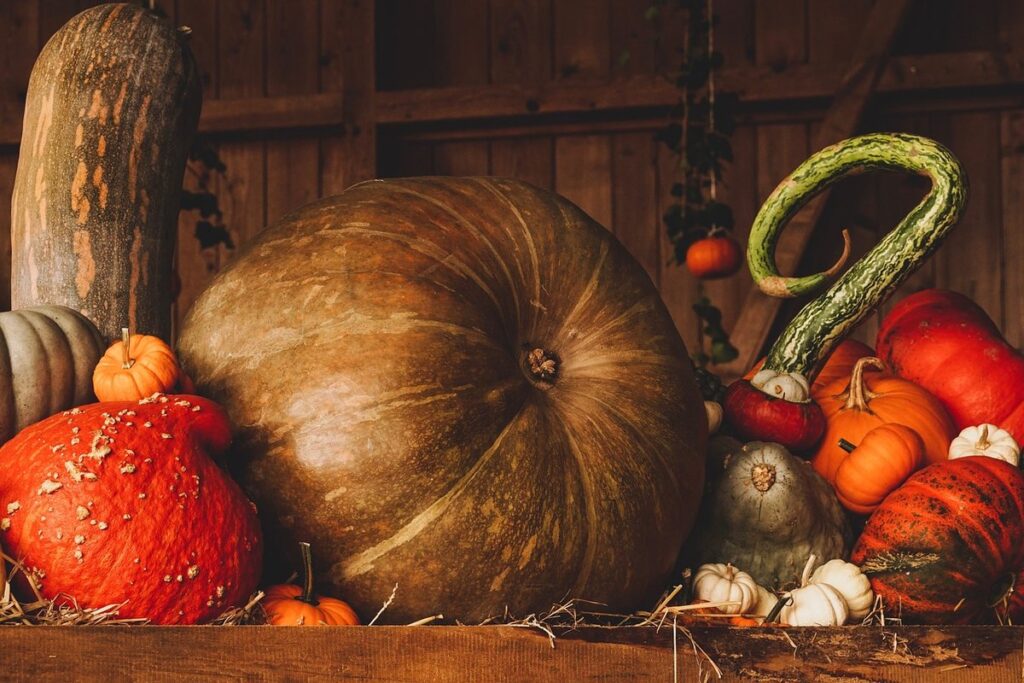
Introduction to Pumpkin Painting
Welcome to pumpkin painting 101! In this beginner-friendly guide, we’ll walk you through the basics of getting started with a fun and creative activity for kids.
Why Pumpkin Painting is Great for Kids
When it comes to engaging activities for kids during the fall season, pumpkin painting is an excellent choice. Not only does it bring a pop of color and creativity to your home decor, but it also offers numerous benefits for young minds.
One of the primary advantages of pumpkin painting is its ability to promote fine motor skills in children. The process involves using various tools such as brushes, sponges, and even their hands to apply paint to the pumpkin’s surface. This action helps improve hand-eye coordination, dexterity, and overall hand function – all essential skills for kids’ development.
Pumpkin painting also fosters creativity and self-expression in children. With an array of colors and designs at their disposal, they can let their imagination run wild and create unique pieces that reflect their personality. For instance, a child might choose to paint a spooky scene for Halloween or a bright and cheerful design for Thanksgiving.
By engaging in pumpkin painting, kids can express themselves freely without fear of making mistakes. This activity encourages experimentation, exploration, and learning – all valuable experiences that contribute to their growth as artists and individuals.
Materials Needed for Pumpkin Painting
To get started with pumpkin painting, you’ll need some essential materials. The most obvious one is, of course, a pumpkin! You can choose from various sizes and shapes, but for kids, smaller ones are often easier to handle. Make sure the pumpkins are clean and dry before you begin.
Next, you’ll need paint specifically designed for pumpkins or ceramics. These paints usually come in sets with a variety of colors, so pick your favorite hues and shades. Don’t forget to get some brushes in different sizes – bigger ones for broad strokes and smaller ones for details.
Other necessary materials include smocks or old shirts to protect clothing from stains, paper towels for cleaning up spills, and a workspace covered with newspaper or a tablecloth. You may also want to have some water handy to rinse the paintbrushes.
If you’re painting with kids, consider getting them their own set of mini brushes, paints, and smocks. This way, they can explore and create freely without worrying about making a mess.
Design Inspiration for Kids’ Pumpkins
Get creative and inspired with these unique design ideas for kids’ pumpkins that are sure to make your little ones’ masterpieces stand out. From simple to elaborate, we’ve got you covered!
Traditional Pumpkin Designs
When it comes to traditional pumpkin designs, kids love creating classic jack-o’-lantern faces and simple patterns. These timeless designs are perfect for little ones to paint, and they’re a great starting point for beginners. A traditional jack-o’-lantern face typically features a smiling or spooky face with triangle eyes and a curved smile.
To create a classic jack-o’-lantern face, start by painting the pumpkin in sections. Use black paint to draw on the eyes, nose, and mouth. Kids can also add some personality to their design by adding details like eyebrows, teeth, or even a silly hat. Simple patterns are another great option for kids to try. They can paint stripes, polka dots, or even a fun design like a spider web.
For younger kids, start with simple shapes and gradually build up to more complex designs. Use bright colors and let their imagination run wild! Some popular traditional designs include a smiling pumpkin face, a ghostly face, or even a cute cat or dog face. Encourage your child to experiment and come up with their own unique design – it’s all about having fun and being creative!
Whimsical and Fun Designs
Take it up a notch with whimsical and fun designs that will transport your little ones to a world of imagination! When it comes to decorating pumpkins for kids, why settle for plain when you can create something truly magical?
Let’s dive into some more complex design ideas that kids can replicate on their pumpkins. For example, why not try painting a beloved cartoon character? Think Mickey Mouse, Minnie Mouse, or even a happy-go-lucky Smurf! Kids love these characters and will have a blast creating them on their pumpkins.
Or, if you’re feeling adventurous, try abstract shapes like stars, moons, or clouds. These designs are perfect for little ones who enjoy making patterns and experimenting with colors. You can also use stencils or stickers to help guide the process and make it more manageable for younger artists.
To add an extra layer of whimsy, consider incorporating textures and patterns into your design. Kids love using glitter glue, stamps, and sponges to create unique effects on their pumpkins. Remember to encourage them to experiment and try new things – after all, that’s what makes art so much fun!
Techniques for Painting Pumpkins
Let’s dive into some fun and easy techniques for painting pumpkins, from simple designs to more intricate patterns that kids will love creating! These ideas are perfect for little artists.
Basic Brush Strokes
When it comes to painting pumpkins with kids, mastering basic brush strokes is essential for creating smooth and even paint lines. Let’s start with the fundamentals! Begin by holding your child’s brush at a 45-degree angle against the pumpkin. This will help them achieve a clean, straight line.
For horizontal strokes, have your child place their thumb on top of the handle to create resistance, allowing the brush to glide smoothly across the surface. For vertical strokes, they can hold the brush vertically and gently press down while moving up the pumpkin. Encourage your little artist to experiment with different pressure levels to achieve varying line widths.
To practice curved lines, have them place their finger on the side of the handle for added control. As they move the brush in a smooth motion, remind them to keep the paint flowing evenly by maintaining light pressure. With these basic strokes mastered, kids will be well on their way to creating stunning pumpkin designs!
Faux Finishing Techniques
When it comes to adding an extra layer of creativity to your pumpkin designs, faux finishing techniques are a great way to go. One popular method is stenciling, where you use a specialized tool or even household items like sponges or credit cards to create intricate patterns and designs on your pumpkin. You can find pre-made stencils online or get creative and make your own using cardstock or acetate.
Another fun technique is decoupage, which involves cutting out images from paper or magazine cutouts and gluing them onto the pumpkin. This adds a unique texture and visual interest to your design. To achieve professional-looking results, apply a thin layer of varnish or Mod Podge over the glued-on image to seal it in place.
You can also experiment with techniques like sponge painting or using fabric paint to add textures and patterns to your designs. The key is to have fun and get creative! With a little experimentation and practice, you’ll be amazed at the unique and beautiful designs you can create on your pumpkins using faux finishing techniques.
Safety Precautions for Pumpkin Painting
To ensure a fun and safe pumpkin painting experience, be sure to follow these essential safety precautions that every parent should know. This includes protecting your child’s hands and clothes from paint stains.
Protecting Skin and Clothing
When painting pumpkins with kids, it’s essential to take precautions to protect their skin and clothing from paint stains and spills. Paint can be messy and permanent, so we want to ensure they’re having fun without worrying about getting a stain on their favorite shirt.
To start, make sure your child is wearing old clothes or an apron that can get stained. You’d be surprised how often a little bit of paint can ruin a new outfit! Consider setting up a “paint station” with a tablecloth or plastic sheet underneath to catch any spills. This will make cleanup a breeze and prevent paint from seeping into surfaces.
When handling paint, encourage your child to wash their hands frequently, especially before eating or touching their face. You may also want to have some soap and water on hand for quick cleanups in case of an accidental spill. With a few simple precautions, you can enjoy this fun fall activity without worrying about the mess it might make!
Cleaning Up After Paint Session
After a fun-filled paint session with the kids, it’s time to clean up and get everything ready for the next creative adventure. Cleaning up after painting pumpkins is an essential part of maintaining a safe and healthy environment.
First things first, wash those paintbrushes! It’s crucial to rinse them thoroughly with soap and warm water to remove any remaining paint residue. This will prevent the paint from drying on the brushes and making them stiff. Let them air dry before storing them away for future use.
When disposing of leftover paint, make sure to follow these steps: scrape off as much excess paint as possible from the container, then dispose of it in a sealed container or bag labeled “paint waste.” Don’t pour leftover paint down the drain or throw it away with regular trash. It’s also a good idea to have some paper towels on hand to clean up any spills.
Finally, take a moment to wipe down surfaces and wash your hands thoroughly. This will help prevent any paint stains from setting in and keep everyone’s hands clean and paint-free. By following these simple steps, you’ll be able to enjoy the fruits of your labor while keeping your workspace tidy and safe for future creative projects.
Displaying Your Masterpiece
Now that you’ve finished painting, it’s time to showcase your little one’s masterpiece for all to see! This section shares ideas on how to beautifully display their pumpkin creations.
Ideas for Pumpkin Displays
Now that you’ve finished painting and decorating those pumpkins with your little ones, it’s time to showcase your masterpiece! A beautifully displayed pumpkin can add a warm, inviting ambiance to your home, making it the perfect centerpiece for fall festivities. Here are some creative ways to display your painted pumpkins:
Use candlelight to create a magical glow: Place a few candles around the base of the pumpkin, and watch as the soft light highlights the vibrant colors and delicate designs on your masterpiece. This not only adds ambiance but also creates a cozy atmosphere perfect for snuggling up with family and friends.
Create a festive arrangement: Group multiple painted pumpkins together in a decorative bowl or vase to create a stunning centerpiece for your dining table or mantel. You can add some fall-themed elements like dried leaves, pinecones, or twigs to add texture and depth to the arrangement.
Think outside the box (or pumpkin patch!): Display your masterpiece on a staircase landing, a shelf, or even a windowsill to create a beautiful focal point in your home. You can also use them as place card holders for your next fall-themed party. Whatever you choose, make sure it’s fun and reflects your family’s personality!
Tips for Making it Last Longer
To make your masterpiece last longer, you’ll want to seal it with a protective layer. Varnish is a popular choice for this job – it’s easy to apply and dries quickly. However, if you’re looking for something more eco-friendly, consider using beeswax or plant-based varnish instead.
Another option is to use sealing wax, which provides an extra layer of protection against moisture and fading. To apply sealing wax, simply melt the wax in a double boiler, then brush it onto your pumpkin using a clean cloth.
To extend the life of your painted pumpkin even further, keep it away from direct sunlight and maintain a consistent temperature between 60-70°F (15-21°C). You can also use a UV-filtering glass or acrylic to display your masterpiece.
Conclusion: Making Pumpkin Painting a Tradition
Now that you’ve tried out these fun pumpkin painting ideas, let’s talk about how to make them a regular tradition for your little ones. We’ll explore ways to get kids excited about pumpkin decorating every year!
Encouraging Kids to Paint Year After Year
As you continue to make pumpkin painting an annual tradition with your kids, it’s essential to encourage them to keep exploring their creativity year after year. Not only will this activity create lasting memories for the whole family, but it also fosters a lifelong appreciation for art and self-expression.
By making pumpkin painting a regular occurrence, you’re giving your children the opportunity to refine their skills, experiment with new techniques, and develop their own unique style. It’s amazing how much kids can grow and improve in just one year – from simple designs to intricate masterpieces! One way to encourage this growth is by introducing new materials or mediums each season. For example, you could try using different types of paint, such as watercolor or metallic, to add an extra layer of excitement.
To make pumpkin painting a tradition that your kids will look forward to year after year, try making it a special event in your home. Set up a cozy workspace with snacks and drinks, put on some fun music, and let the creativity flow! By doing so, you’ll create a sense of anticipation and expectation around this activity, which will only strengthen its place in your family’s annual traditions.
Ideas for Expanding the Activity
As you and your kids have enjoyed creating beautiful artwork on pumpkins, it’s time to think about taking this activity to the next level. One idea is to incorporate other fall-themed crafts into your pumpkin-painting sessions. For instance, consider setting up a station for leaf rubbings, where children can collect fallen leaves and create delicate impressions on paper using crayons or pencils. You could also try making pinecone bird feeders, acorn cap wreaths, or even a cornucopia centerpiece.
Another way to expand the activity is by hosting a pumpkin-painting party for friends, family, or neighbors. Invite guests to bring their own pumpkins and painting supplies, and provide some basic designs or stencils for inspiration. You can also offer some fun fall-themed music, snacks, and drinks to create a festive atmosphere.
To make the experience even more engaging, consider having a contest or a “pumpkin parade” where kids can show off their creations. The possibilities are endless, and with a little creativity, you can turn this activity into a beloved tradition that brings people together while creating memories for years to come.
Frequently Asked Questions
How do I prepare my pumpkin for painting if it’s not completely dry?
Before you start painting, make sure your pumpkin is completely dry. If you’re using a real pumpkin, let it air dry for at least 24 hours after cutting or carving. For artificial pumpkins, check the manufacturer’s instructions for any special preparation requirements.
What are some easy ways to clean up spills and messes while painting?
Accidents can happen! Keep paper towels or a lint-free cloth handy to quickly clean up spills and smudges on your pumpkin or work surface. Also, consider using washable paint and a drop cloth to protect your furniture from stains.
How can I make my child’s pumpkin artwork last longer?
To preserve your child’s masterpiece, apply a clear coat of varnish after the paint is fully dry. This will protect the design from fading and damage over time. You can also consider displaying their artwork in a shaded area or using UV-filtering glass to prevent color loss.
Can I use regular kitchen brushes for pumpkin painting?
While it might be tempting, we recommend using high-quality, synthetic brushes specifically designed for painting pumpkins. These brushes will hold more paint and produce smooth, even strokes. Plus, they’re easier to clean!
What are some creative ways to display my child’s painted pumpkin after the project is complete?
Get creative with your display! Consider placing their pumpkin on a mantel, shelf, or windowsill where it can add a pop of color and personality to your home decor. You can also create a seasonal vignette by grouping several pumpkins together in a decorative bowl or basket.